Types
Attributes differ by the type of entity they are linked to. Each type corresponds to its own module in the system.
Attribute types:
- Administrators
- Blocks
- Pages
- Products
- Users
- Forms
- User groups
- Events
- For discounts
- System
If you create an attribute for pages, you can't use it in products or forms. When you link an attribute to an entity, the system shows which attributes you can use there.
List of types
- Image
- List
- Time interval
- JSON
- String
- Text
- Text with header
- Integer
- Real number
- Floating point number
- Date and time
- Date
- Time
- File
- Group of Images
- Switch
- Spam protection
- Button
- Entity
Type-specific features
Some types have specific features you should know about.
Attributes for users
Attribute sets of this type store information about the users of your application. You can store a login, email, username, address, workplace, and so on. Information used to verify a user must be explicitly specified in the system: you must specify which field is the login, which is the password, and which is the email. For the authorization system to work correctly, the user attribute set must contain these three attributes. You can collect any other user information as you see fit.
Even if you use email as the login, you still need to create both a "login" attribute and an "email" attribute.
Options specific to the fields of these attributes:
- Use as login
- Use as password
- Use for email notifications
- Use for Push notifications
- Use for SMS notifications
- Use in the registration form
Attributes for products
Attributes of this type store product information. Additional settings of this attribute set type let you, for example, tell the system which attribute to use as the product price.
Options specific to the fields of these attributes:
- Contains price
- Contains currency
- Contains SKU
- Contains tax rate
Split price
The price attribute supports split mode, which divides the product cost into several parts paid in stages.
If split is enabled for the price attribute, select adjacent attributes (in the required order); each of them sets the amount of one payment part. Two modes are available:
Numerical: each part attribute contains a specific amount. The parts must add up to the full product price.
Price attribute  — 2000
Part A           — 1500
Part B           — 500
Percentage: each part attribute contains a percentage of the full price (a value from 0 to 100). The parts must add up to 100.
Price attribute  — 2000
Part A           — 75  (= 1500 ₽)
Part B           — 25  (= 500 ₽)
General type attributes
Attribute sets of the general type have no additional settings for their fields.
Image
An "Image" or "Group of Images" attribute contains one or more image files and has additional tools for working with them.
Upload optimization
Attributes for uploading images have an image upload optimization setting. Optimization is enabled by default. To upload the original image without quality loss, open the attribute settings and turn this setting off.
Preview
If there are several image attributes and you want the system to display a specific image, open the settings of that image attribute and enable "Use as preview in the product list". The selected image then becomes the main image of the product in the catalog.
Preview template
You can add a preview image template to an image attribute. Learn more about preview templates here. (opens in a new tab)
Menu icon
For an Image attribute intended for pages, you can specify that the image is used as an icon in the menu. (opens in a new tab)
List
A "List" attribute contains one or more properties that you configure in the attribute in advance and then choose from in entities.
List configuration
Open the "List" attribute for editing by clicking the edit icon 
In the form for adding a new list property, specify:
- Name: a non-unique string used within the OneEntry platform.
- Value: a string with the property value.
- Type: the property type.
- Additional value: optional. If no value is added to the list property, the additional value is used.
Then click "Add". The new property is added to the list.
Changing a list property
Select the property you want to change and click "Change". The form is filled with the data of this property. Change the property and click "Change".
Deleting a list property
Select the property you want to delete and click "Delete". The property is deleted and removed from the list.
Using a "List" attribute
After you configure the list properties, attach the attribute set to an entity of the matching type. For example, you can attach an attribute set of the "Pages" type to a page.
In a "List" attribute field, you can select one property from the list.
Multi-select for a "List" attribute
To save more than one property in the attribute, select the "Allow selection of multiple values" checkbox. You can then add several values to the entity attribute at once.
Time interval
The "Time interval" attribute lets you use a calendar to create, plan, and manage time intervals. For example, you can use it to build the schedule of a beauty salon specialist.
To start configuring it, open the "Time interval" attribute for editing by clicking the "Settings" edit icon.
Date interval configuration
Select a date interval in the calendar. To create a one-day interval, click the date twice.
If you don't need several intervals, click "Select the whole month".
The last day of the month is a special dynamic interval that depends on the current month.
Once you select an interval, you can configure it.
Interval options
Every week (available if the period is a week or shorter): repeats the interval every week of the selected month. Every month: repeats the interval every month of the selected year. Every year: repeats the interval every year.
These three main settings appear again in other parts of the attribute. They let you combine recurrence for the selected items. For example:
- To create an organization's weekly schedule for the current year, select the work week interval (for example, Monday – Friday) and set "Every week" and "Every month".
- To set an interval for specific dates (for example, a spring fair held from April 7 to April 11), use the interval 07.04 – 11.04 with a single setting: "Every year".
Automatic time period generation
You can also set time boundaries for the interval: the time range defined for each day within the interval.
Start period: the field for the start of the time interval. End period: the field for the end of the time interval.
These boundaries can repeat within the specified range. After you click "New interval", a selector appears. In the selector, choose the duration of the time period within the interval; select the checkbox to split the interval into equal periods. After you configure the time interval, click "Save interval" to save the changes. Add intermediate interval: adds intermediate time intervals (for example, break time). Clicking it opens the same selector as for automatic time period generation.
Exceptions
To set special rules for certain dates, click the date in the interval on the calendar. The date turns red and appears in the "Exceptions" list. Note: until you configure the exception, it is only highlighted in the intervals. Exception settings have the options Every week, Every month, and Every year, plus a few more. All day: excludes the selected day from the interval entirely, so it can't be selected in attributes. Alternatively, you can close specific time intervals. Click "Settings" to open a modal window with all time periods defined for the date interval. If you don't need to exclude the whole day, select the time periods to exclude there.
The "Receive Values" checkbox
If you select this checkbox while creating the attribute, you can set its values in the calendar right away. The values are saved in the attribute set (Attribute Set) and can be retrieved through the API.
How it works:
Filling in values at creation: after you select the checkbox, a calendar opens where you can choose the values.
API access: the entered values are linked to the attribute and available at the corresponding endpoint in the Attributes Sets request group.
Example: If the attribute is created with "Receive Values" enabled, an API request returns this value right away, together with the other attribute parameters.
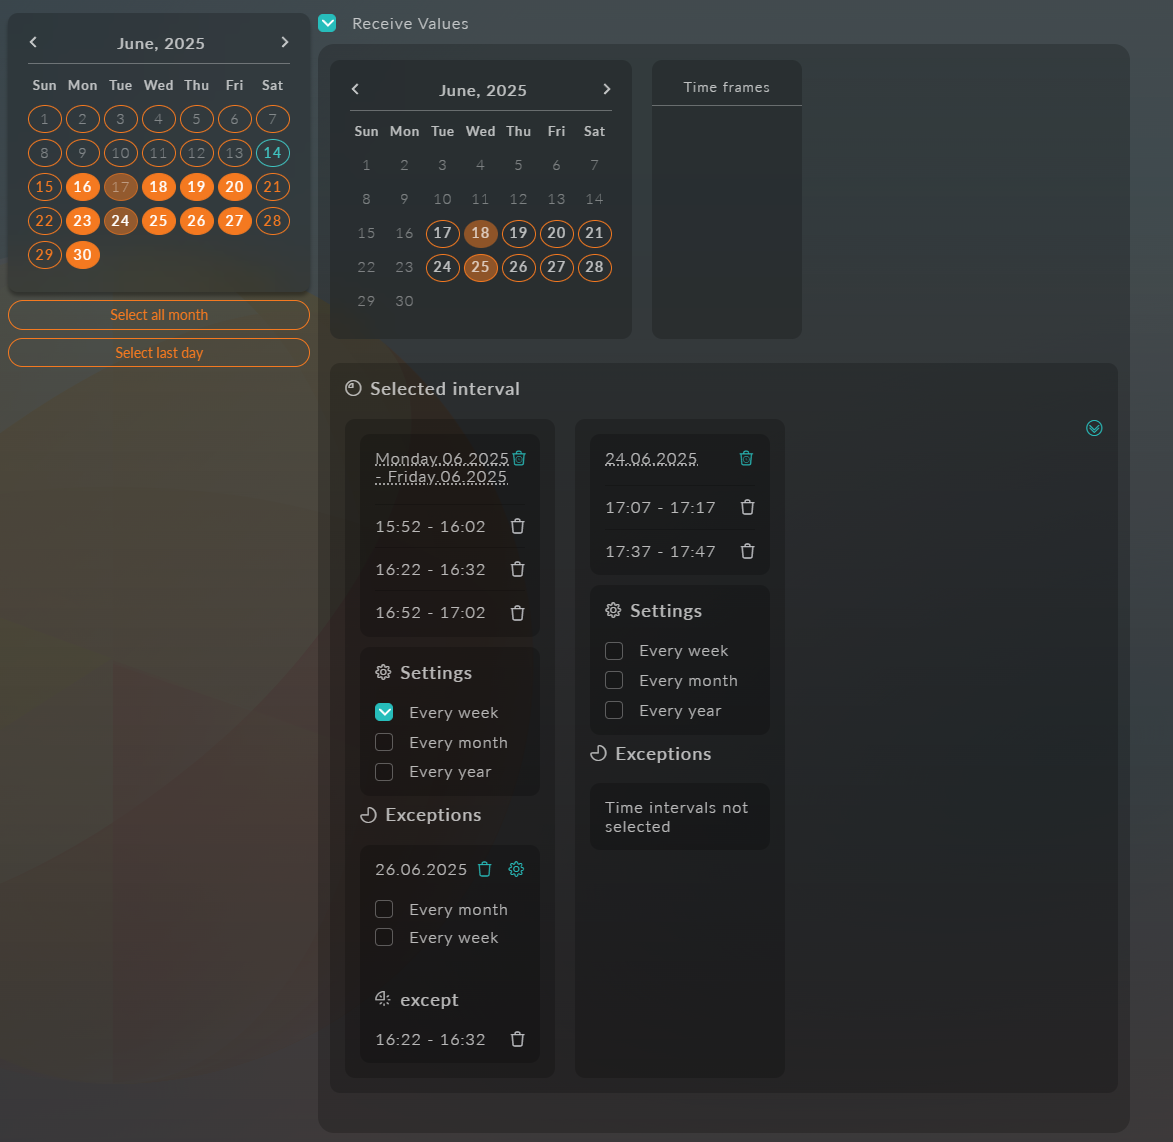
Selection in the attribute
Working with configured intervals means choosing the start and end of a period, within which you select the configured time. First, select the start date and the end date in the calendar.
The selected interval appears in the list of selected intervals on the right, where you can set its recurrence: "Every week", "Every month", "Every year".
For this interval, you can select time periods based on the settings made earlier.
You can also add and configure dates to exclude from the selected period. Click the date in the active interval, and it appears in the "Exceptions" list.
Exceptions can cover whole days or specific time intervals. By default, selecting a date excludes the whole day, but you can set exact time intervals if needed. To do this, use the settings button: the calendar is replaced by a list of time slots, where you select the exceptions for the selected date.
To cancel an exception but keep its recurrence in other cases, click the generated exception (Important: clicking the original exception date cancels the entire chain of exceptions). The date is then added to the exception's "Except" list.
Example of a configured interval:
Json
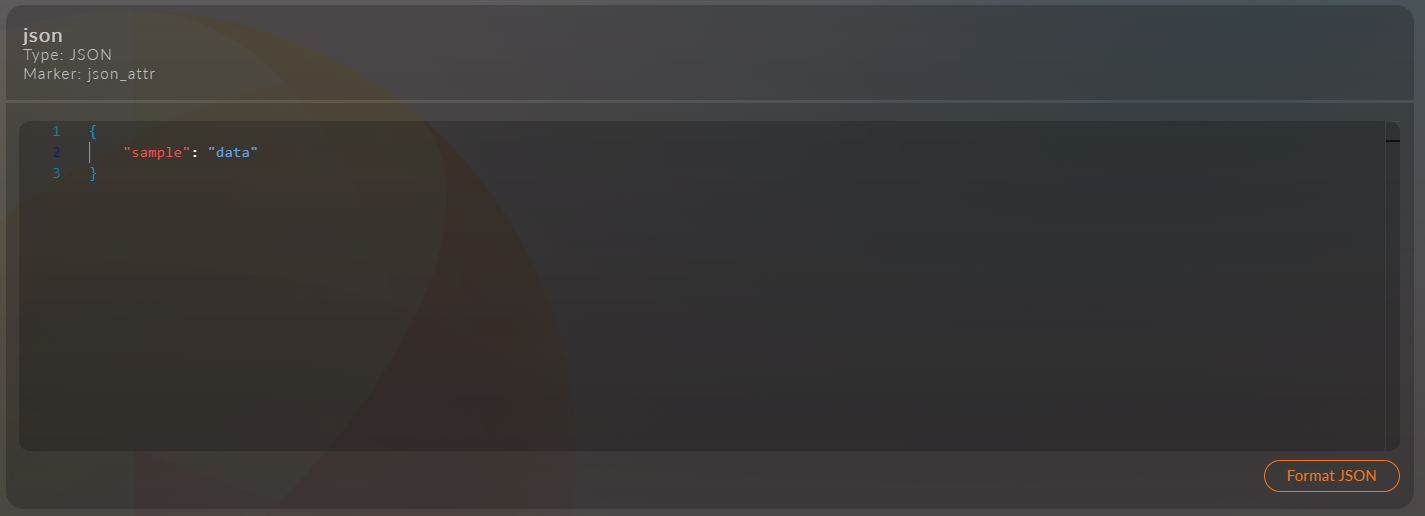
This attribute stores arbitrary data in JSON format.
String
An attribute for string values (text of any length).
Text
A text field with extended options:
- Formatting (bold, italic, lists, links)
- Inserting images and tables
- Editing in three modes:
- Visual editor
- Markdown
- Plain text mode
Text with header
A text block with a header and the same editing options:
- All formatting features of the regular text field
- An additional header field above the text
- Editing in three modes:
- Visual editor
- Markdown
- Plain text mode
Integer
An attribute for integer values without a fractional part.
Real number
A real number with a fractional part.
Floating point number
A real floating-point number with limited precision.
A dedicated field for entering floating-point numbers.
Date and time
A field for selecting a date and time in a calendar.
Date
An attribute for a date only (without time).
Time
A field for a time value (hours:minutes).
File
An attribute for uploading and storing files of any type.
Group of Images
An attribute for uploading and managing a collection of images.
Switch
An interface element for choosing one of the offered options. It is configured the same way as the List attribute.
Spam protection
A component that protects forms from spam bots.
In the attribute editor, you must select Captcha Type: google or yandex. The server doesn't save a spam protection attribute without a captcha type. The Additional settings button appears after you select the type. For google, it lets you select domains (My Domains) and create a captcha key; for both types, it shows an integration example (Integration Example).
In the current version, you can't create a spam protection attribute from the add attribute form: the server rejects it without a captcha type ("Data saving error"), and you can select Captcha Type only in the editor of an attribute that already exists.
Button
An interactive element that performs actions (submitting a form, etc.).
Entity
An attribute for linking to other entities in the system.
An "Entity" attribute contains a tree of properties that you configure in the attribute in advance and then choose from in entities.
Tree configuration
Open the "Entity" attribute for editing by clicking the edit icon
In the form for adding a new list property, specify the data type:
- Pages
- Products
You can then select data; the available data depends on the selected type.
Selecting a checkbox adds the data to the tree.
After you select the data, you can change its nesting depth and order.