Example Integration with FedEx
In this tutorial, we will show you how to integrate FedEx.
1. Preparation
1.1. Create a FedEx account
Create an account on the developer portal.
1.2. Create projects and obtain tokens
Create 2 projects in the my projects section and save the client id and client secret.
The first project is for managing shipments.
The second project is for tracking shipments.
1.3. Create statuses for delivery
In the order storage status tab create statuses:
- order_delivery
- order_delivery_started
- ready_for_pickup
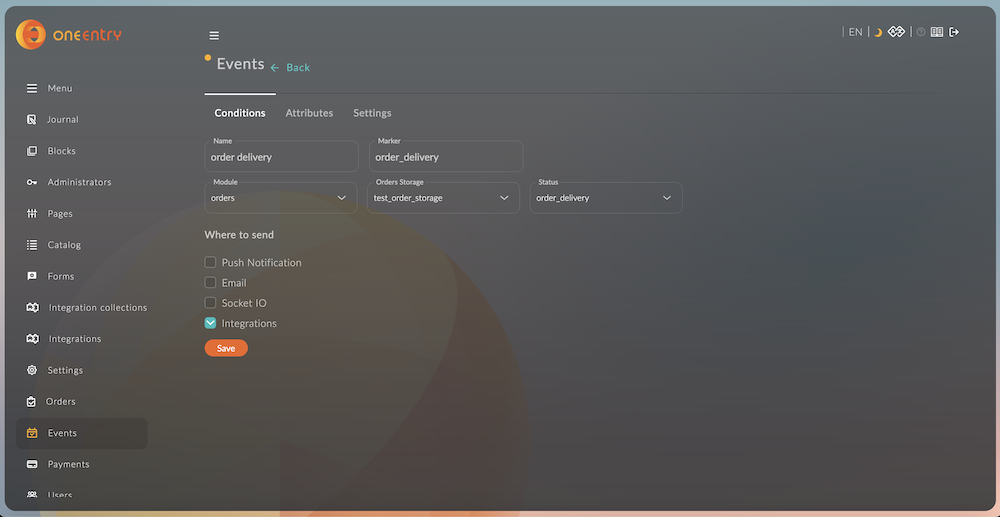
1.4. Create an event to track statuses
In the Events module, create an event to track the status change of the order order_delivery.
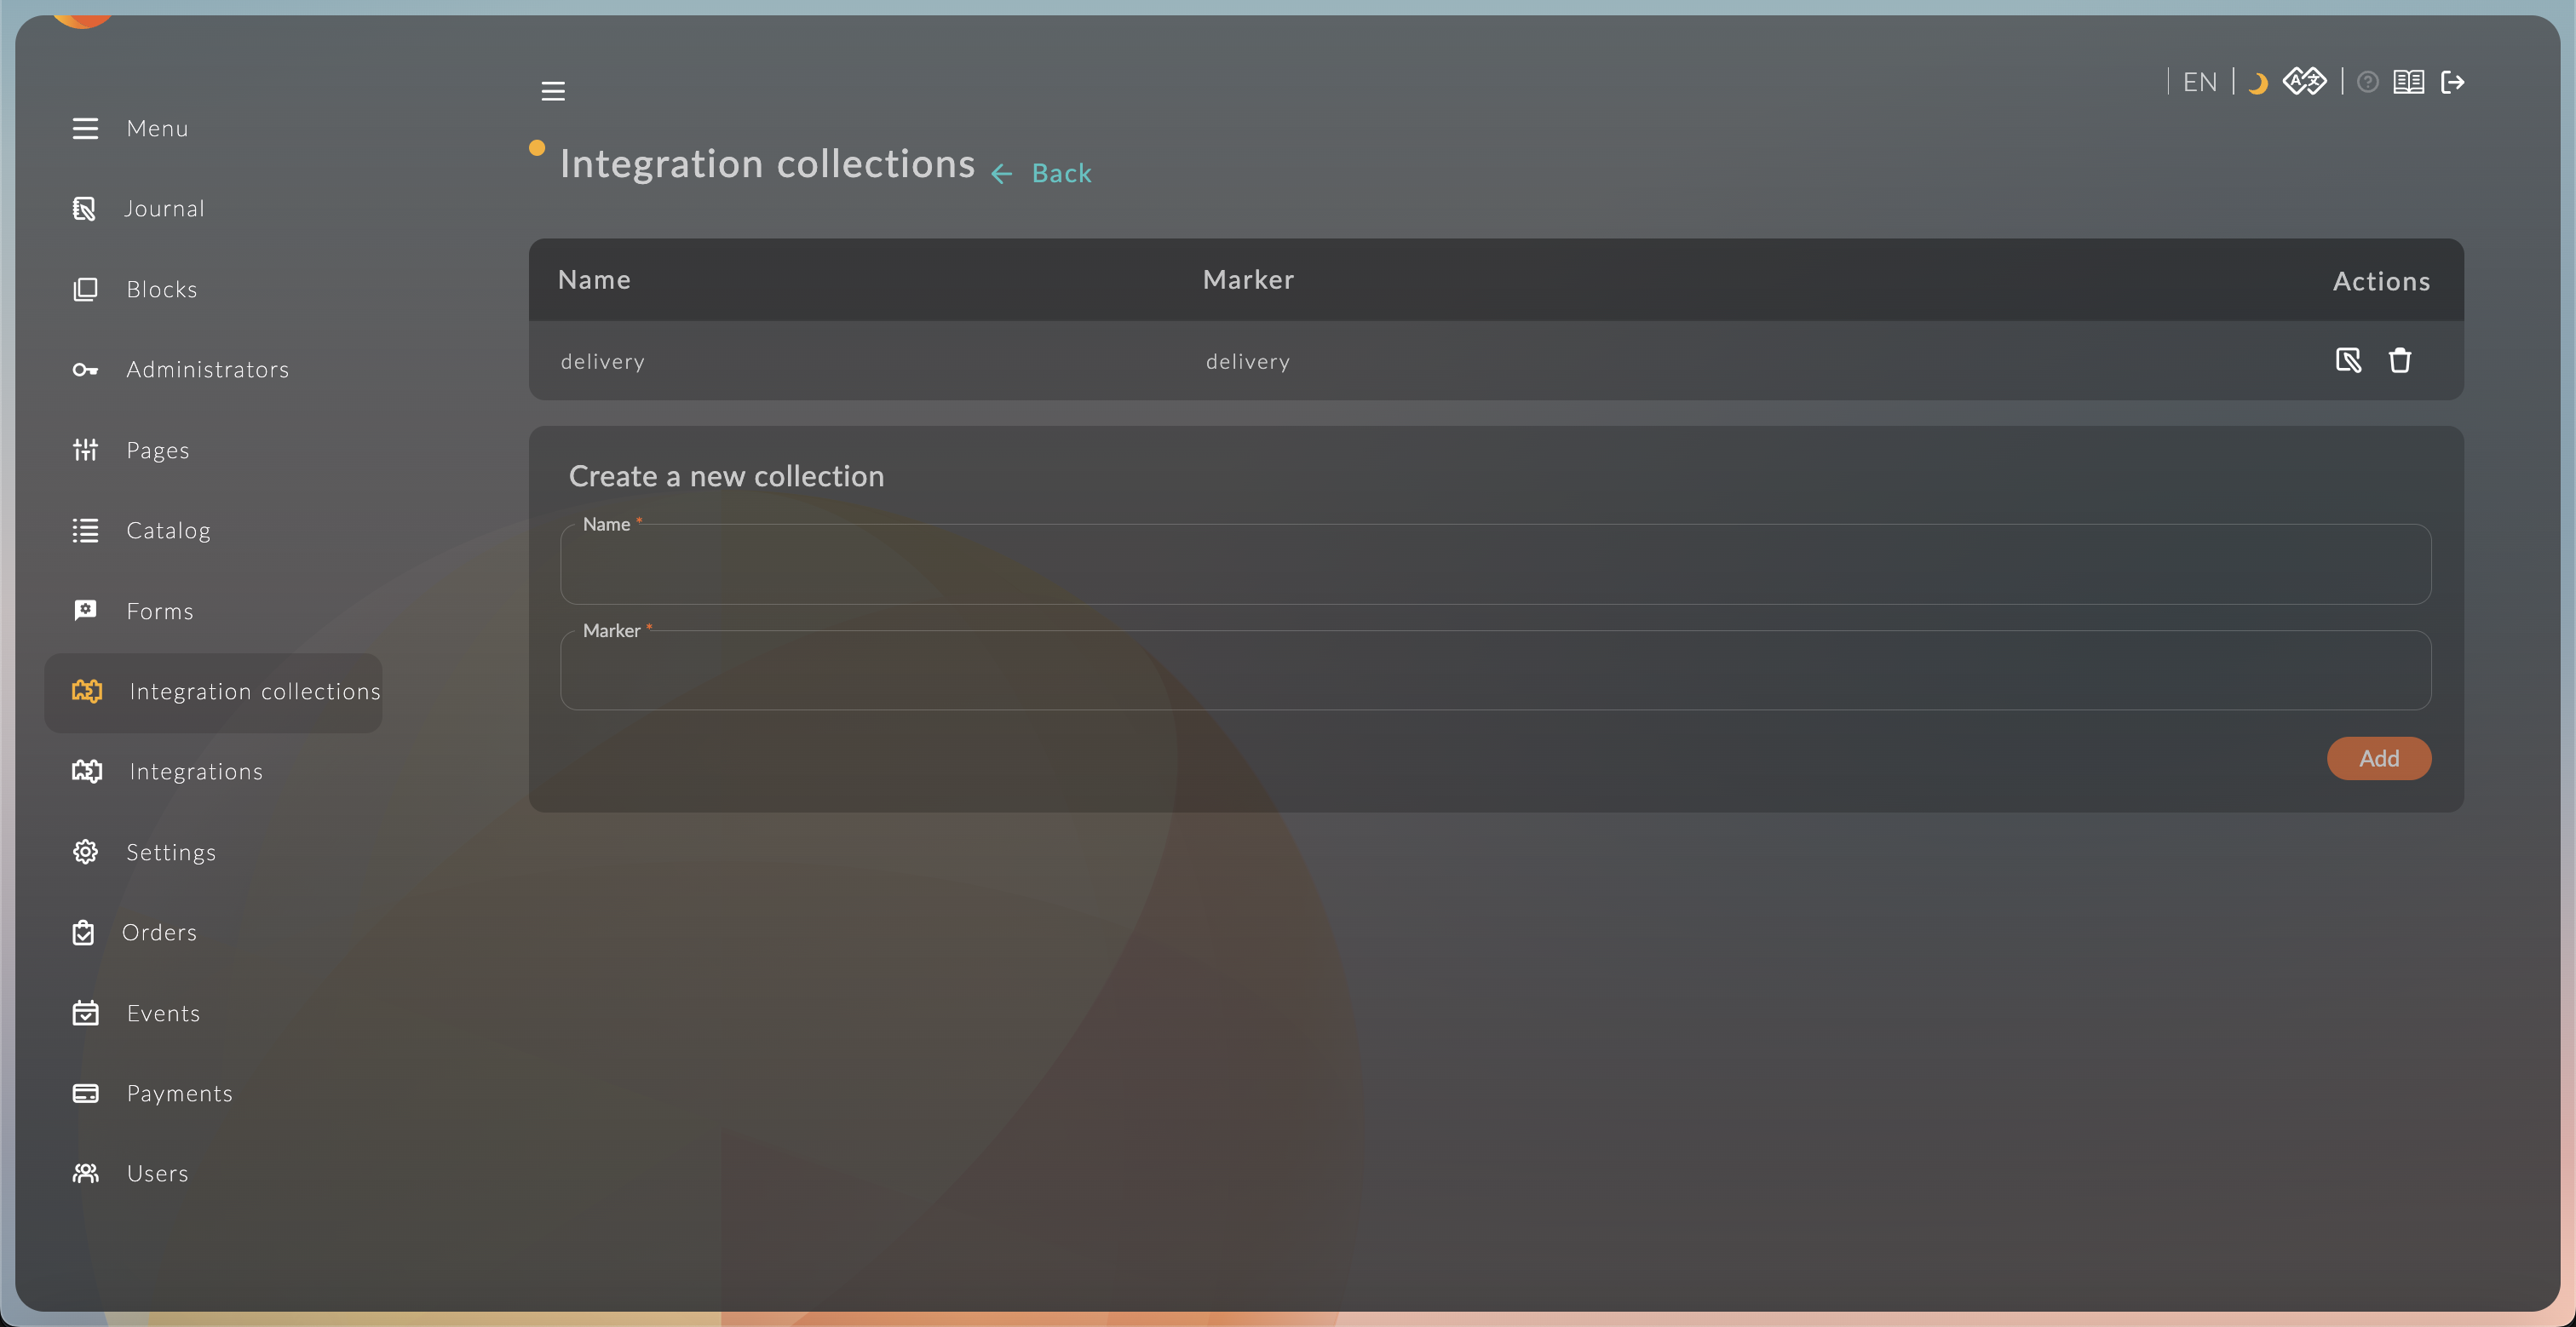
1.5. Create a collection for delivery
In the Integration Collections module, create a collection for delivery with the following attributes:
- name (
string) - address (
string) - phone_number (
string) - city (
string) - state_code (
string) - postal_code (
string) - country_code (
string) - tracking_number (
string) - transaction_id (
string) - ship_datestamp (
string) - delivery_datestamp (
string)
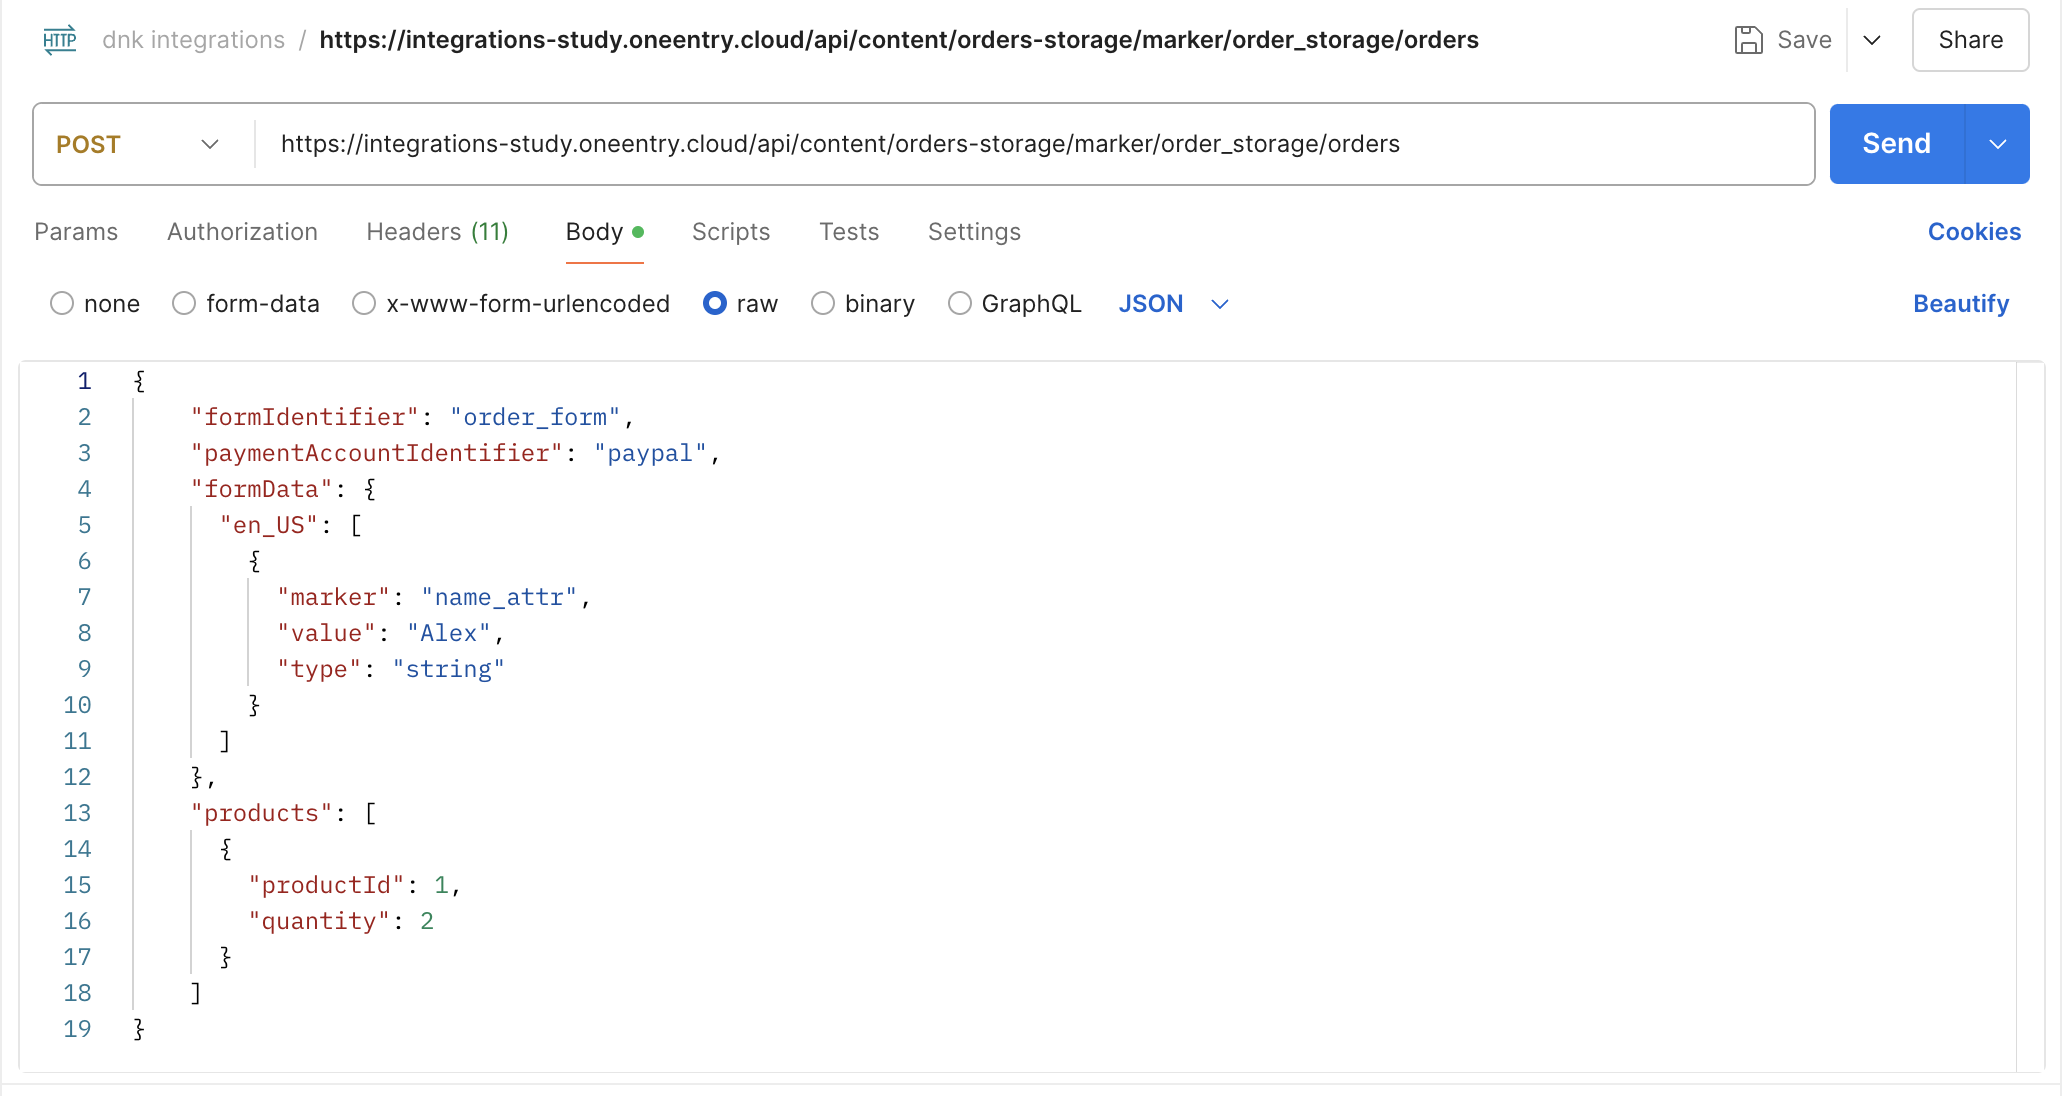
1.6. Create a test order
Create an order and a record in the collection for this order.
2. Creating a Shipment
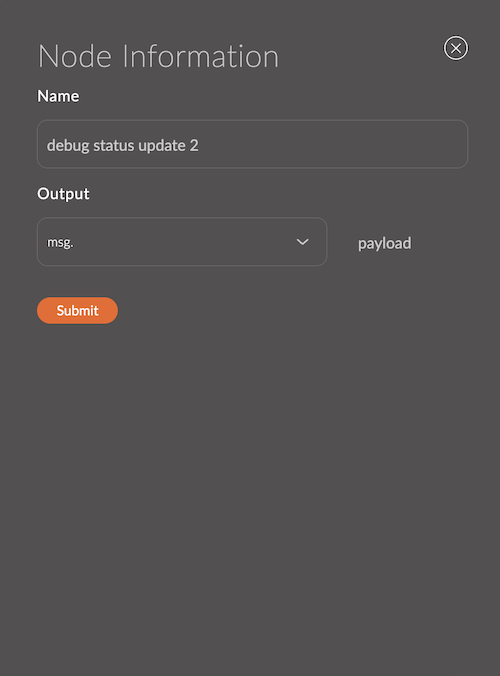
2.1. Tracking the delivery event
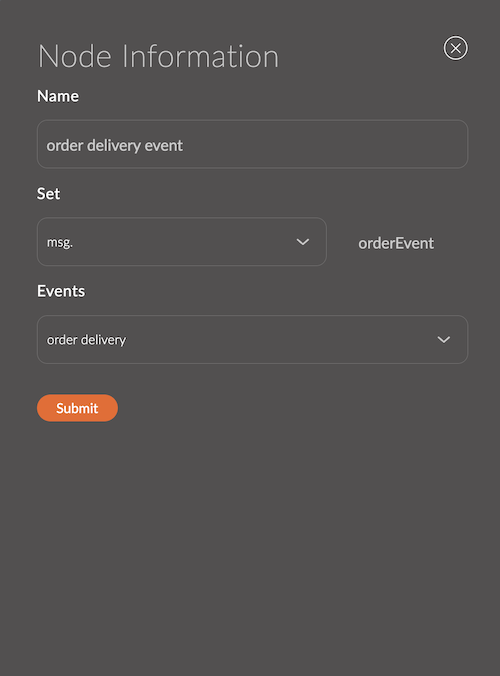
- Drag the events node onto the workspace.
- Enter the name of the node.
- Change the value in the "Set" field to "orderEvent".
- The event will be saved in the "msg.orderEvent" object and can be used in other nodes.
- Select the created event "order delivery" from the list and click "submit".
2.2. Obtaining a token
- Drag the function node onto the workspace and connect it to the node from the previous step.
- Paste the code from the example into the "Function" field.
- Replace
YOUR_CLIENT_IDandYOUR_CLIENT_SECRETwith your own.

msg.payload = {
    'grant_type': 'client_credentials',
    'client_id': 'YOUR_CLIENT_ID',
    'client_secret': 'YOUR_CLIENT_SECRET'
}
msg.headers = {
    'Content-Type': 'application/x-www-form-urlencoded'
}

return msg;
You can find more about the parameters in the FedEx documentation.
- Drag the http request node onto the workspace and connect it to the node from the previous step.
- Select "POST" in the Method field.
- Select "Send as request body" in the Data field.
- Paste the link
https://apis-sandbox.fedex.com/oauth/tokeninto the Link field. - Select "Object JSON" in the Return field.

- Drag the function node onto the workspace and connect it to the node from the previous step.
- Paste the code from the example into the "Function" field.
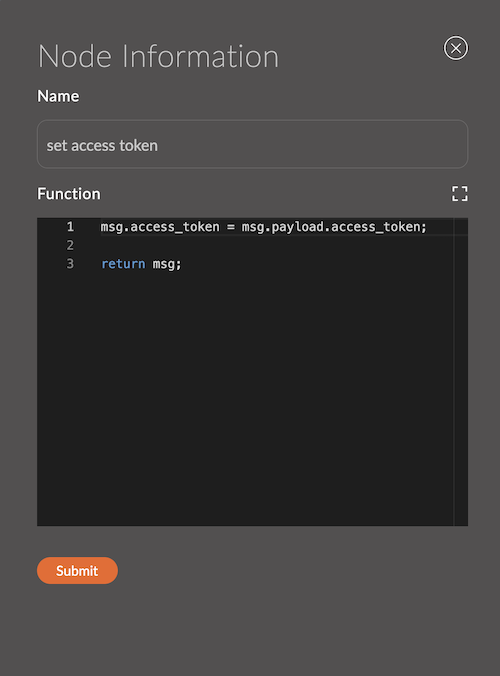
msg.access_token = msg.payload.access_token;

return msg;
2.3. Creating a shipment
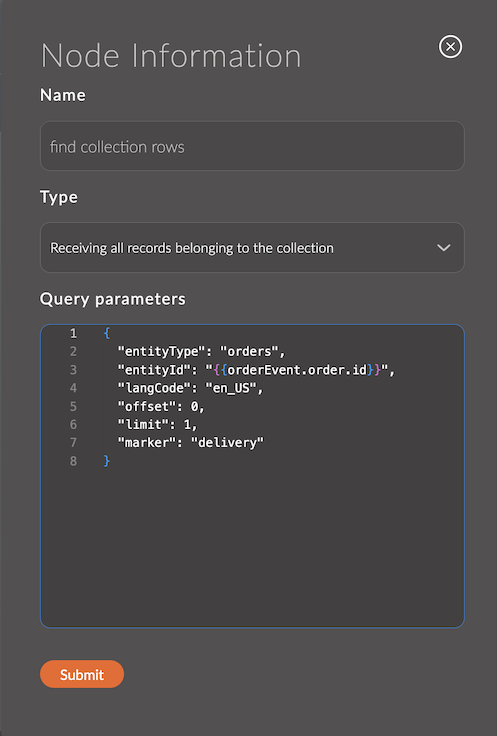
- Drag the admin-api node onto the workspace and connect it to the node from the previous step.
- Select "Receiving all records belonging to the collection" and paste the code below into the "Data" field.
{
  "entityType": "orders",
  "entityId": "{{orderEvent.order.id}}",
  "langCode": "en_US",
  "offset": 0,
  "limit": 1,
  "marker": "delivery"
}
- Drag the function node onto the workspace and connect it to the node from the previous step.
- Paste the code from the example into the "Function" field.
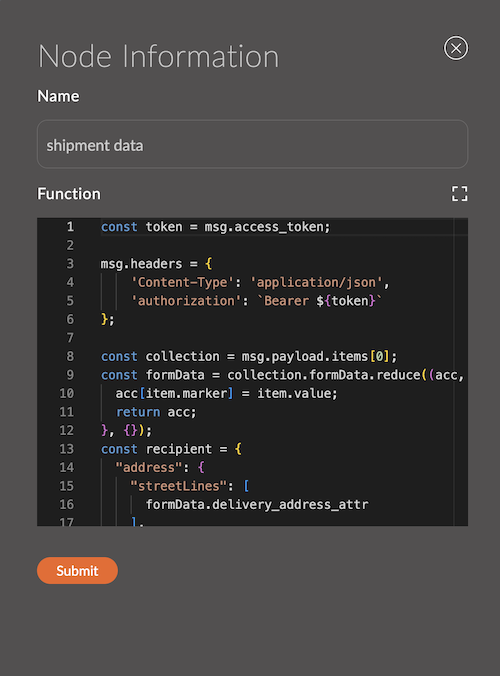
// get the previously saved token
const token = msg.access_token;

// set the headers
msg.headers = {
    'Content-Type': 'application/json',
    'authorization': `Bearer ${token}`
};

// get collections from the previous step
const collection = msg.payload.items[0];
// convert the array to an object
const formData = collection.formData.reduce((acc, item) => {
  acc[item.marker] = item.value;
  return acc;
}, {});
// set recipient parameters from the form
const recipient = {
  "address": {
    "streetLines": [
      formData.address
    ],
    "city": formData.city,
    "stateOrProvinceCode": formData.state_code,
    "postalCode": formData.postal_code,
    "countryCode": formData.country_code
  },
  "contact": {
    "personName": formData.name,
    "phoneNumber": formData.phone_number
  }
}
// set collection data in msg for future use
msg.collection = collection;
// set request parameters for FedEx
msg.payload = {
  "labelResponseOptions": "URL_ONLY",
  "accountNumber": {
    "value": "510087020"
  },
  "requestedShipment": {
    "shipper": {
      "contact": {
        "personName": "SENDER NAME",
        "phoneNumber": "9018328595"
      },
      "address": {
        "streetLines": [
          "SENDER ADDRESS 1"
        ],
        "city": "MEMPHIS",
        "stateOrProvinceCode": "TN",
        "postalCode": "38116",
        "countryCode": "US"
      }
    },
    "recipients": [
      recipient
    ],
    "serviceType": "STANDARD_OVERNIGHT",
    "packagingType": "YOUR_PACKAGING",
    "pickupType": "DROPOFF_AT_FEDEX_LOCATION",
    "shippingChargesPayment": {
      "paymentType": "SENDER",
      "payor": {
        "responsibleParty": {
          "accountNumber": {
            "value": "510087020",
            "key": ""
          }
        },
        "address": {
          "streetLines": [
            "SENDER ADDRESS 1"
          ],
          "city": "MEMPHIS",
          "stateOrProvinceCode": "TN",
          "postalCode": "38116",
          "countryCode": "US"
        }
      }
    },
    "labelSpecification": {},
    "requestedPackageLineItems": [
      {
        "customerReferences": [
          {
            "customerReferenceType": "CUSTOMER_REFERENCE",
            "value": `Collection${collection.id}`
          }
        ],
        "weight": {
          "units": "LB",
          "value": "20"
        }
      }
    ]
  }
};

return msg;
You can find more about the parameters in the FedEx documentation.
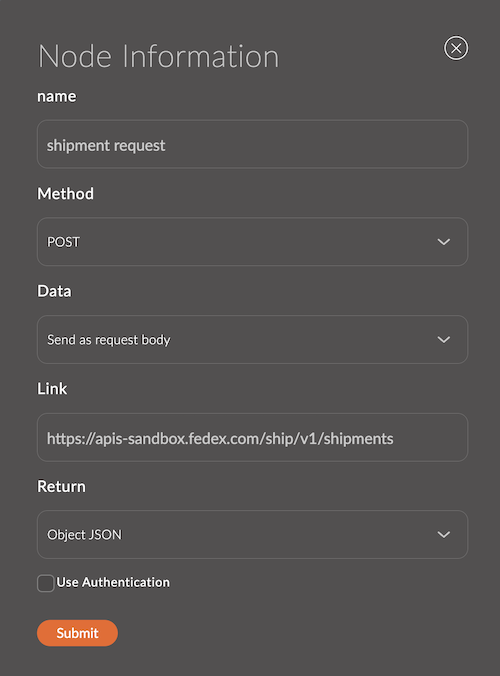
- Drag the http request node onto the workspace and connect it to the node from the previous step.
- Select "POST" in the Method field.
- Select "Send as request body" in the Data field.
- Paste the link
https://apis-sandbox.fedex.com/ship/v1/shipmentsinto the Link field. - Select "Object JSON" in the Return field.
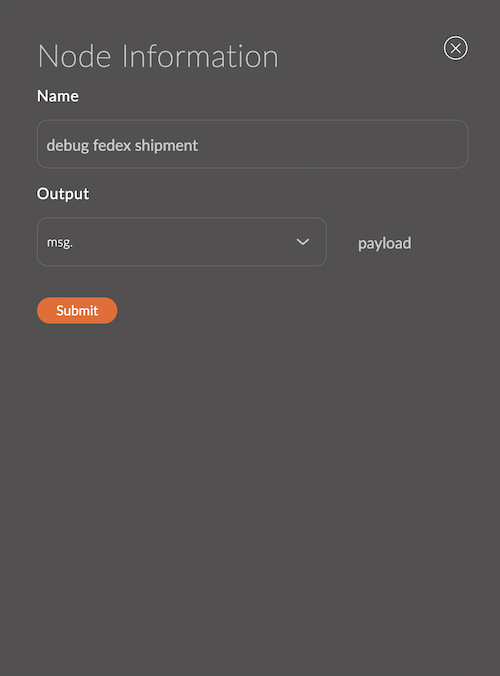
- Drag the debug node onto the workspace and connect it to the node from the previous step.
- Drag the function node onto the workspace and connect it to the node from the previous step.
- Paste the code from the example into the "Function" field.
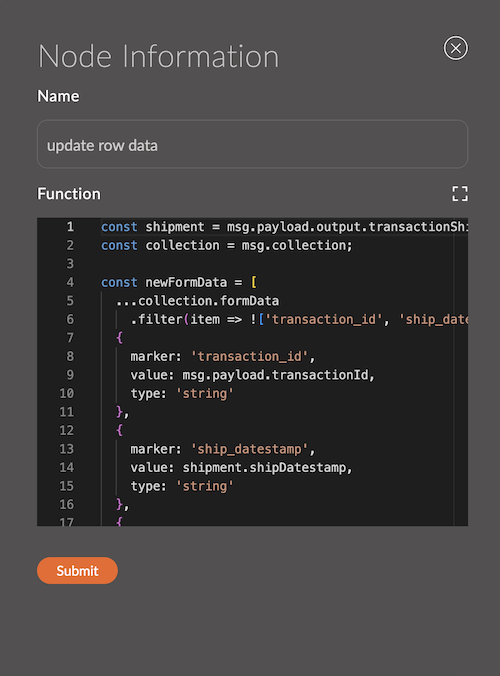
// get shipment data
const shipment = msg.payload.output.transactionShipments[0];
// get the previously saved collection data
const collection = msg.collection;

// write shipment data into form attributes
const newFormData = [
  ...collection.formData
    .filter(item => !['transaction_id', 'ship_datestamp', 'delivery_datestamp', 'tracking_number'].includes(item.marker)),
  {
    marker: 'transaction_id',
    value: msg.payload.transactionId,
    type: 'string'
  },
  {
    marker: 'ship_datestamp',
    value: shipment.shipDatestamp,
    type: 'string'
  },
  {
    marker: 'delivery_datestamp',
    value: shipment.pieceResponses[0].deliveryDatestamp,
    type: 'string'
  },
  {
    marker: 'tracking_number',
    value: shipment.masterTrackingNumber,
    type: 'string'
  }
]

// set parameters for updating the collection
msg.params = {
  langCode: 'en_US',
  id: collection.id,
  marker: 'delivery'
}

msg.data = {
  formIdentifier: 'delivery_form',
  formData: {
    en_US: newFormData
  },
  entityId: collection.entityId,
  entityType: collection.entityType
}

// save collection data for future use
msg.collection = collection;

return msg;
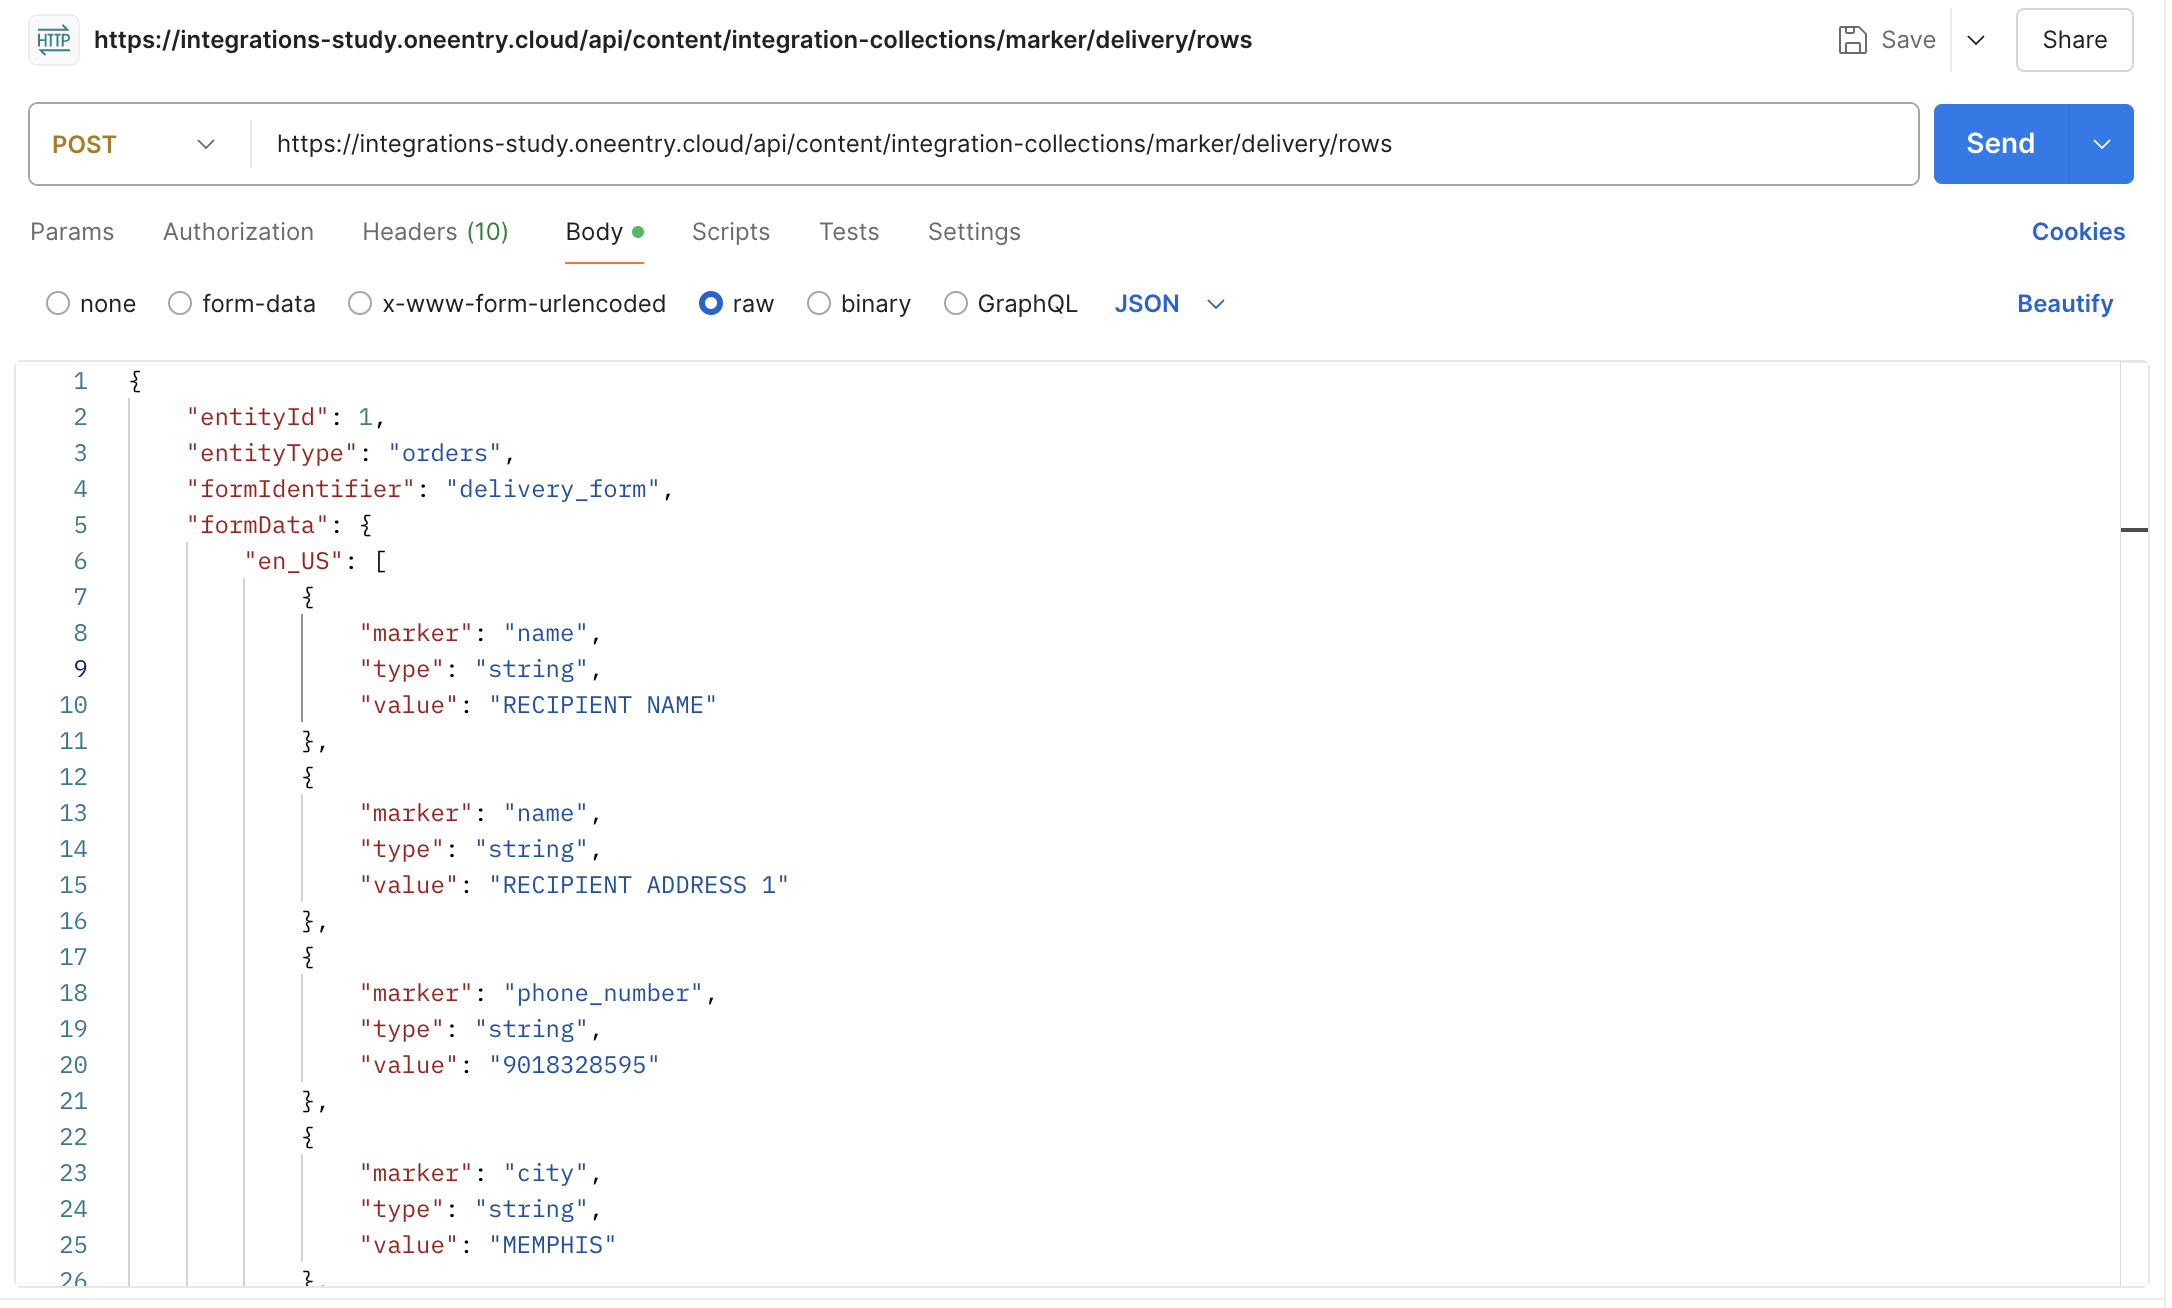
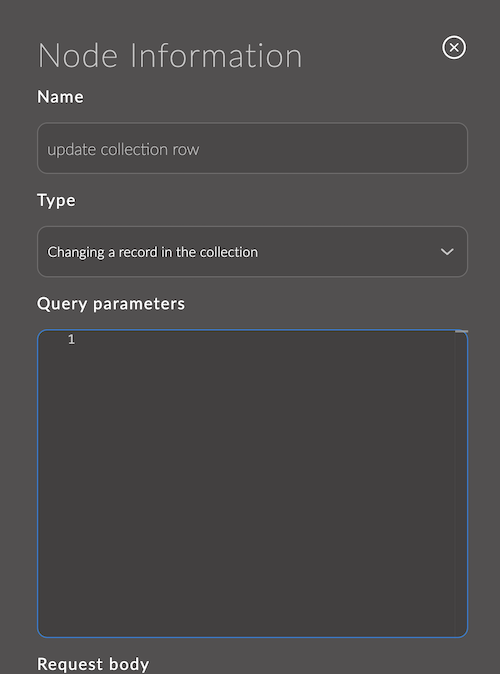
- Drag the admin-api node onto the workspace and connect it to the node from the previous step.
- Select "Changing a record in the collection".
2.4. Updating the order status
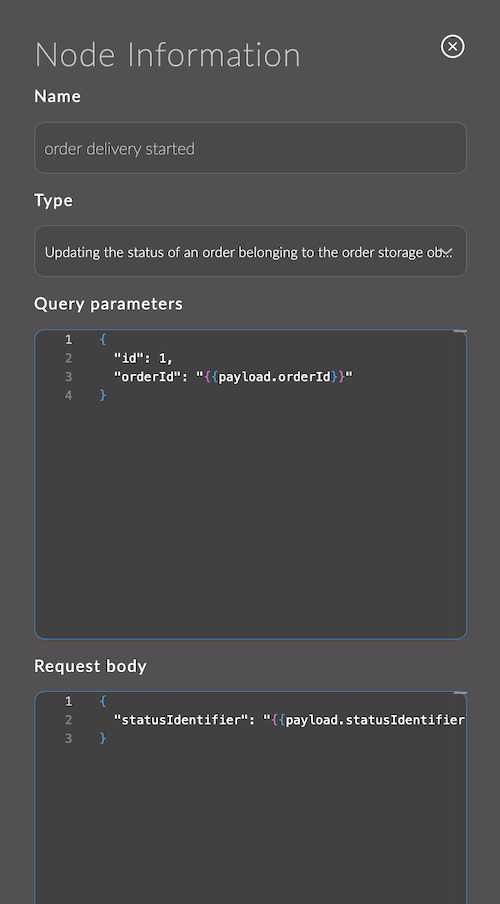
- Drag the admin-api node onto the workspace and connect it to the node from the previous step.
- Select "Updating the status of an order belonging to the order storage object".
- Paste the code below into the "Query parameters" field.
{
  "id": 1,
  "orderId": "{{collection.entityId}}"
}
- Paste the code below into the "Request body" field.
{
  "statusIdentifier": "order_delivery_started"
}
- Drag the debug node onto the workspace and connect it to the node from the previous step.

3. Tracking Shipment Status
3.1. Retrieving orders for tracking
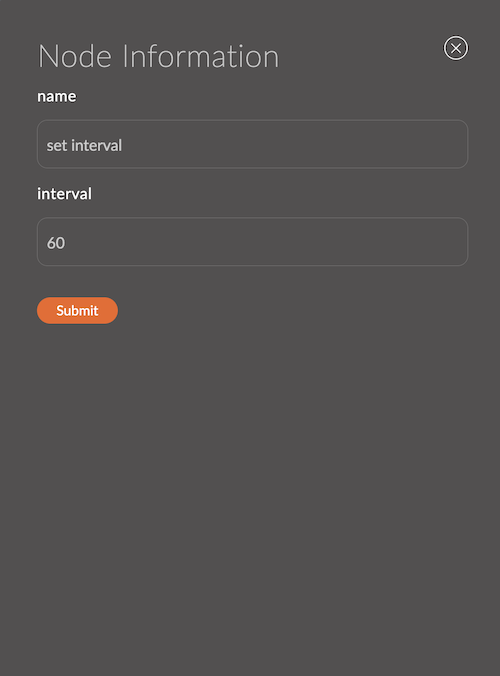
- Drag the interval node onto the workspace and connect it to the node from the previous step.
- Enter the interval in minutes.
- Drag the admin-api node onto the workspace and connect it to the node from the previous step.
- Select "Receiving all orders belonging to the order storage object".
- Paste the code below into the "Query parameters" field.
{
  "statusIdentifier": "order_delivery_started",
  "langCode": "en_US",
  "offset": 0,
  "limit": 100,
  "id": 1
}

- Drag the function node onto the workspace and connect it to the node from the previous step.
- Paste the code from the example into the "Function" field.

msg.payload = msg.payload.items;

return msg;
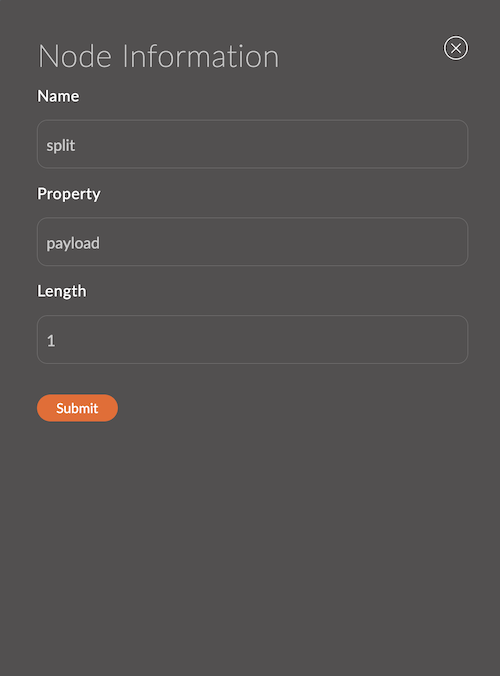
- Drag the split node onto the workspace and connect it to the node from the previous step.
- Enter the length.
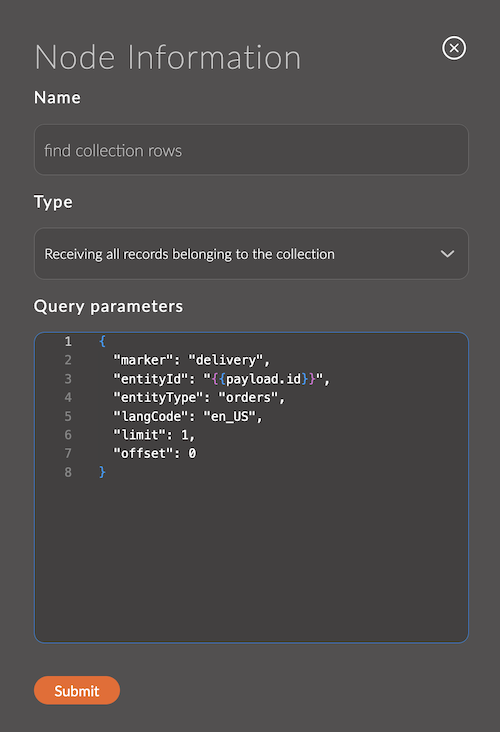
- Drag the admin-api node onto the workspace and connect it to the node from the previous step.
- Select "Receiving all records belonging to the collection".
- Paste the code below into the "Query parameters" field.
{
  "marker": "delivery",
  "entityId": "{{payload.id}}",
  "entityType": "orders",
  "langCode": "en_US",
  "limit": 1,
  "offset": 0
}
- Drag the function node onto the workspace and connect it to the node from the previous step.
- Paste the code from the example into the "Function" field.

msg.payload = msg.payload.items[0]

return msg;
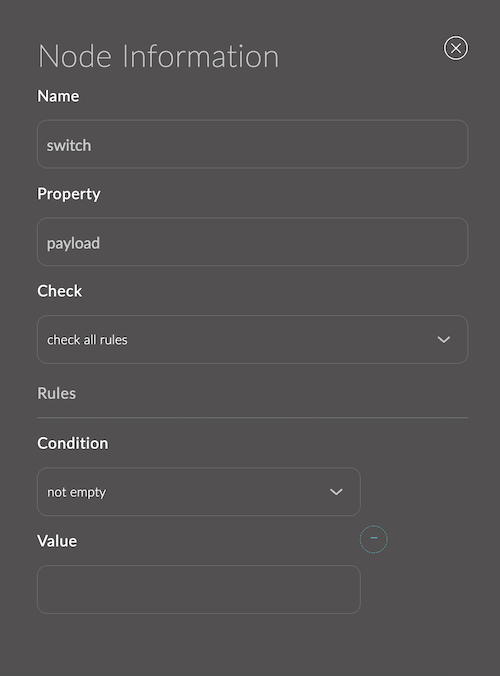
- Drag the switch node onto the workspace and connect it to the node from the previous step.
- Add a rule for checking. Select the condition "not empty".
- Drag the function node onto the workspace and connect it to the node from the previous step.
- Paste the code from the example into the "Function" field.
![]()
msg.trackingNumber = msg.payload
  .formData
  .find(item => item.marker === 'tracking_number')
  .value;

msg.collection = msg.payload;

return msg;
3.2. Obtaining a token
- Drag the function node onto the workspace and connect it to the node from the previous step.
- Paste the code from the example into the "Function" field.
- Replace
YOUR_CLIENT_IDandYOUR_CLIENT_SECRETwith your own.
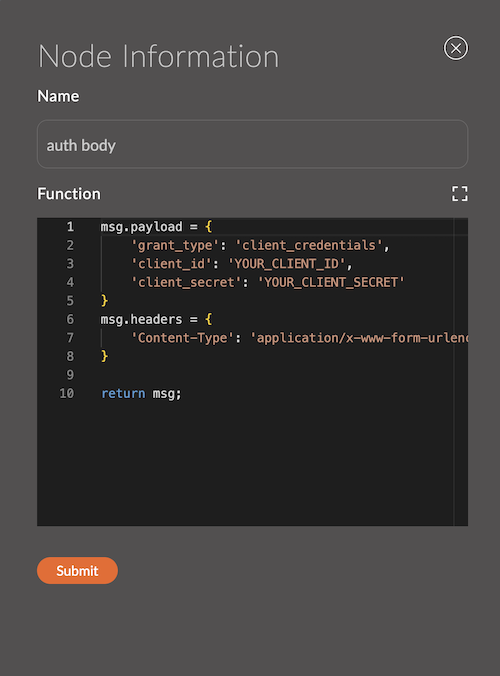
msg.payload = {
    'grant_type': 'client_credentials',
    'client_id': 'YOUR_CLIENT_ID',
    'client_secret': 'YOUR_CLIENT_SECRET'
}
msg.headers = {
    'Content-Type': 'application/x-www-form-urlencoded'
}

return msg;
You can find more about the parameters in the FedEx documentation.
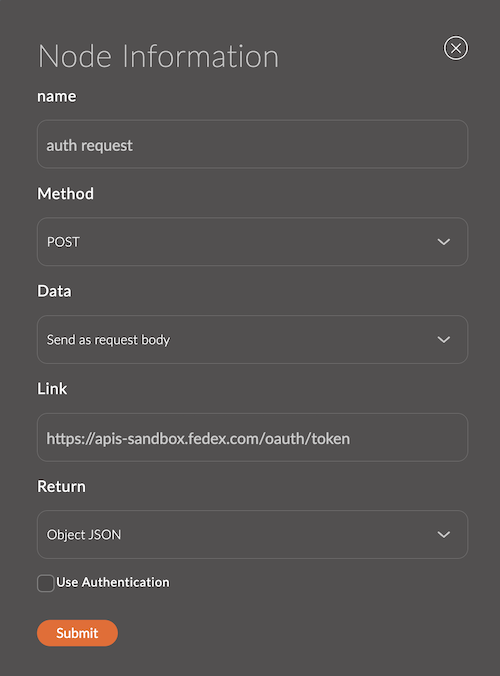
- Drag the http request node onto the workspace and connect it to the node from the previous step.
- Select "POST" in the Method field.
- Select "Send as request body" in the Data field.
- Paste the link
https://apis-sandbox.fedex.com/oauth/tokeninto the Link field. - Select "Object JSON" in the Return field.
3.3. Retrieving shipment status
- Drag the function node onto the workspace and connect it to the node from the previous step.
- Paste the code from the example into the "Function" field.
![]()
const token = msg.payload.access_token;

msg.headers = {
    'content-type': 'application/json',
    'authorization': `Bearer ${token}`
};

msg.payload = {
  "trackingInfo": [
    {
      "trackingNumberInfo": {
        "trackingNumber": msg.trackingNumber
      }
    }
  ],
  "includeDetailedScans": true
}

return msg;
You can find more about the parameters in the FedEx documentation.
- Drag the http request node onto the workspace and connect it to the node from the previous step.
- Select "POST" in the Method field.
- Select "Send as request body" in the Data field.
- Paste the link
https://apis-sandbox.fedex.com/track/v1/trackingnumbersinto the Link field. - Select "Object JSON" in the Return field.
![]()
- Drag the function node onto the workspace and connect it to the node from the previous step.
- Paste the code from the example into the "Function" field.
![]()
msg.payload = msg.payload.output.completeTrackResults[0].trackResults[0].latestStatusDetail.statusByLocale;

return msg;
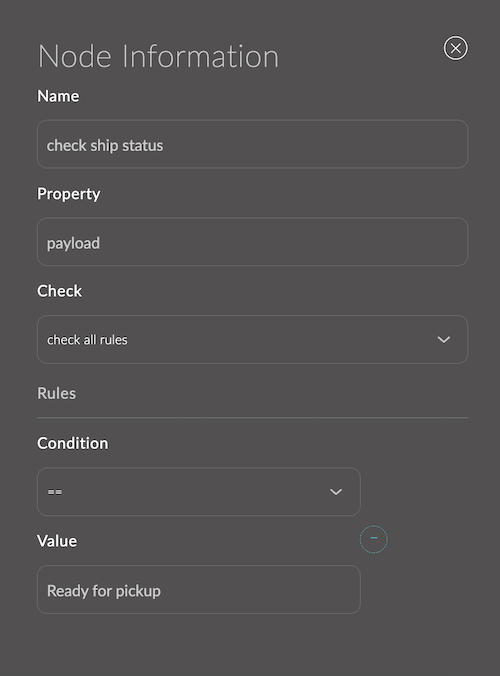
3.4. Updating the order status
- Drag the switch node onto the workspace and connect it to the node from the previous step.
- Add a rule for checking. Select the condition "==", and enter "Ready for pickup" as the value.
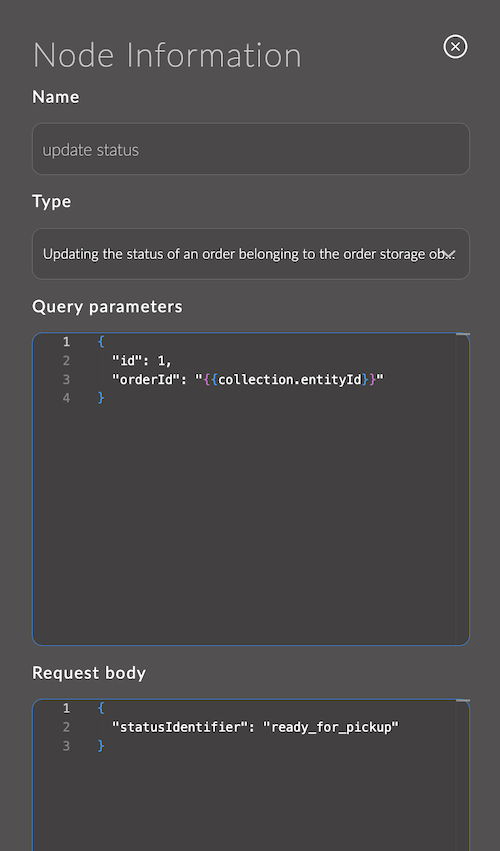
- Drag the admin-api node onto the workspace and connect it to the node from the previous step.
- Select "Updating the status of an order belonging to the order storage object".
- Paste the code below into the "Query parameters" field.
{
  "id": 1,
  "orderId": "{{collection.entityId}}"
}
- Paste the code below into the "Request body" field.
{
  "statusIdentifier": "ready_for_pickup"
}
- Drag the debug node onto the workspace and connect it to the node from the previous step.