Example Integration with PayPal
In this tutorial, we will show you how to integrate PayPal and explore new nodes.
1. Tracking the Order Creation Event
1.1. The "order created" event in the "Events" module.
To track events in the "Integrations" module, create an event in the "Events" module.
The Events block is described in detail here.
1.2. Tracking the Order Creation Event.
- Drag the "events" node onto the workspace.
- Change the value in the "Set" field to "orderEvent".
- The event will be saved in the "msg.orderEvent" object and can be used in other nodes.
- Select the created event "order created" from the list and click "submit".
In this example, we subscribe to the order creation event and save the event in "msg.orderEvent" for future use.
More details about the Events node can be found here.
2. Creating a Payment Session
2.1. Create a Payment Account
Before starting the integration, create a custom account for PayPal.
Instructions on how to do this are described here.
2.2. Create a Payment Session
- Drag the "admin-api" node onto the workspace and connect it to the node from the previous step.
- Select the method "Creating a payment session" and insert the code from the description below into the "Request body" field.
{
  "orderId": {{orderEvent.order.id}},
  "type": "session"
}
Here, we extract the order ID from the "msg.orderEvent" object and form a request to create a payment session. The session creation request takes parameters: "orderId" - the identifier and "type" - the type of payment session (session or intent).
More details about the admin-api node can be found here.
2.3. Set the Received Identifier in msg.paymentSessionId
- Drag the "function" node onto the workspace and connect it to the node from the previous step.
- Insert the code from the example into the "Function" field.
Here, we set the payment session ID obtained from the previous node into "msg.paymentSessionId".
msg.paymentSessionId = msg.payload.id

return msg
More details about the Function node can be found here.
3. Authentication with PayPal
3.1. Set Parameters for Authentication with PayPal
- Drag the "function" node onto the workspace and connect it to the node from the previous step.
- Insert the code from the example into the "Function" field.
Here, we set values in the "payload" and "headers" fields of the "msg" object. These values are needed for the next node.
// set the request body
msg.payload = {
    grant_type: 'client_credentials',
}
// set the headers
msg.headers = {
    'Content-Type': 'application/x-www-form-urlencoded',
    Accept: 'application/json',
}

return msg
More about payment parameters can be found in the PayPal documentation.
More details about the Function node can be found here.
3.2. Request for Access Token
- Drag the "http request" node onto the workspace and connect it to the node from the previous step.
- Select "POST" in the Method field.
- Select "Send as request body" in the Data field.
- Insert the link
https://api-m.sandbox.paypal.com/v1/oauth2/tokenin the Link field. - Select "Object JSON" in the Return field.
- Choose "Use Authentication".
- Enter your client ID in the "Username" field and your client secret for PayPal in the "Password" field.
This request is needed to obtain the "access_token".
More about authentication can be found in the PayPal documentation.
More details about the http request node can be found here.
3.3. Set Parameters for Creating a Payment Link
- Drag the "function" node onto the workspace and connect it to the node from the previous step.
- Insert the code from the example into the "Function" field.
In this example, we form a request to create a payment link based on data from the previous nodes.
// access_token for paypal, obtained in the "paypal auth" node
const accessToken = msg.payload.access_token
// order data, obtained in the "order created" node
// the order object corresponds to the order from the orders API https://oneentry.cloud/instructions/api
const order = msg.orderEvent.order
// payment session ID, obtained in the "create payment session" node
const paymentSessionId = msg.paymentSessionId

// form data for paypal based on order data
const items = order.products.map((product) => {
    return {
        name: product.title,
        description: 'your description',
        quantity: String(product.quantity),
        unit_amount: {
            currency_code: order.currency,
            value: product.price,
        },
    }
})

const totalSum = parseFloat(order.totalSum)

const data = {
    intent: 'CAPTURE',
    purchase_units: [
        {
            items,
            custom_id: String(paymentSessionId),
            amount: {
                currency_code: order.currency,
                value: totalSum,
                breakdown: {
                    item_total: {
                        currency_code: order.currency,
                        value: totalSum,
                    },
                },
            },
            payment_instruction: {
                billingId: String(order.id),
            },
        },
    ],
    payment_source: {
        paypal: {
            experience_context: {
                payment_method_preference: 'UNRESTRICTED',
                payment_method_selected: 'PAYPAL',
                brand_name: 'EXAMPLE INC',
                locale: 'en-US',
                landing_page: 'LOGIN',
                shipping_preference: 'NO_SHIPPING',
                user_action: 'PAY_NOW',
                return_url: 'https://example.com/return',
                cancel_url: 'https://example.com/cancel',
            },
        },
    },
}

// Request body
msg.payload = data
// Request headers
msg.headers = {
    'Content-Type': 'application/json',
    Authorization: `Bearer ${accessToken}`,
    Prefer: 'return=representation',
}

return msg
More details can be found in the PayPal documentation.
More details about the Function node can be found here.
4. Creating a Payment Link
In this example, the "http request" node is used. It can be used to make HTTP requests.
- Drag the "http request" node onto the workspace and connect it to the node from the previous step.
- Select "POST" in the Method field.
- Select "Send as request body" in the Data field.
- Insert the link
https://api-m.sandbox.paypal.com/v2/checkout/ordersin the Link field. - Select "Object JSON" in the Return field.
In this example, we made a request to PayPal to generate a payment link with data from the previous node.
More details can be found in the PayPal documentation.
More details about the http request node can be found here.
5. Updating the Payment Session
- Drag the "admin-api" node onto the workspace and connect it to the node from the previous step.
- Select the method "Payment session update".
- Insert the code from the description below into the "Query parameters" field.
{
  "id": {{paymentSessionId}}
}
- Insert the code from the description below into the "Request body" field.
{
  "paymentUrl": "{{{payload.links.1.href}}}"
}
Here, we extract the payment link identifier "msg.paymentSessionId" and the payment link "msg.payload.links[0].href" from previous requests.
More about the returned values can be found in the PayPal documentation.
More details about the admin-api node can be found here.
6. Adding an Endpoint to Retrieve the Payment Link
6.1. Set the Topic "createPaymentLink"
- Drag the "function" node onto the workspace and connect it to the node from the previous step.
- Insert the code from the example into the "Function" field.
This is needed to identify the current flow.
msg.topic = 'createPaymentLink'

return msg
More details about the Function node can be found here.
6.2. Create an Endpoint to Retrieve the Payment Link
- Drag the "http in" node onto the workspace.
- Select "POST" as the method.
- Enter the link
/get-payment-link.
This endpoint will be needed to retrieve the current payment link.
More details about the http in node can be found here.
6.3. Set the Topic "getPaymentLink"
- Drag the "function" node onto the workspace and connect it to the node from the previous step.
- Insert the code from the example into the "Function" field.
This is needed to identify the current flow.
msg.topic = 'getPaymentLink'

return msg
More details about the Function node can be found here.
6.4. Save Data in Context
- Drag the "function" node onto the workspace and connect it to the node from the previous step.
- Insert the code from the example into the "Function" field.
This is needed to form the response.
// get current order id
const orderId = msg.payload.orderId
// current context key
const contextKey = `payment_link_${orderId}`
// get OneEntry api
const api = global.get('api')
// current context data
const contextData = flow.get(contextKey) || {}
// set data to context by topic
if (msg.topic === 'createPaymentLink') {
    contextData.paymentSessionId = msg.paymentSessionId
    contextData.createPaymentLinkCompleted = true
}
if (msg.topic === 'getPaymentLink') {
    contextData.getPaymentLinkCompleted = true
    contextData.res = msg.res
}
// set context data to context
flow.set(contextKey, contextData)
// if createPaymentLink and getPaymentLink completed, send response with current session
if (
    contextData.createPaymentLinkCompleted &&
    contextData.getPaymentLinkCompleted
) {
    // get payment session by id from api
    const paymentSession = await api.getPaymentSessionById({
        id: contextData.paymentSessionId,
    })
    msg.payload = paymentSession
    msg.res = contextData.res

    // clear api
    flow.set(contextKey, null)

    return msg
}

return null
More details about the Function node can be found here.
6.5. Output Point for the Payment Link
- Drag the "http response" node onto the workspace and connect it to the node from the previous step.
This is needed to output the response to the request.
More details about the http response node can be found here.
7. Setting Up Webhooks for PayPal
7.1. Input Point for PayPal
- Drag the "http in" node onto the workspace.
- Select "POST" as the method.
- Enter the link
/paypal.
This endpoint will be needed to update the payment status via PayPal.
More details about the http in node can be found here.
7.2. Response to the Request
- Drag the "function" node onto the workspace and connect it to the node from the previous step.
- Insert the code from the example into the "Function" field.
This is needed to form the response.
msg.payload = {
    ok: true,
}

return msg
More details about the function node can be found here.
7.3. Output Point for PayPal
- Drag the "http response" node onto the workspace and connect it to the node from the previous step.
This node is needed to output the response to the request.
More details about the http response node can be found here.
7.4. Getting the Payment Status
- Drag the "function" node onto the workspace and connect it to the node from the previous step.
- Insert the code from the example into the "Function" field.
In this node, we take the value obtained from the "paypal webhook" node and write it to "msg.status" for use in the next node.
msg.status = msg.payload.resource.status

return msg
More details about the Function node can be found here.
7.5. Checking the Payment Status
- Drag the "switch" node onto the workspace and connect it to the node from the previous step.
- In "Property", write the value "status".
- Add the first rule for checking. Select the condition "==", and enter "APPROVED" as the value.
- Add the second rule for checking. Select the condition "else".
This node will check the value from "msg.status" against the specified rules. If the value is "APPROVED", the nodes from the first branch will be executed; otherwise, those from the second branch will be executed.
More details about the switch node can be found here.
7.6. Getting the Payment Session ID
- Drag the "function" node onto the workspace and connect it to the node from the previous step.
- Insert the code from the example into the "Function" field.
In this node, we take the payment session ID that we saved in the "set payment data" node.
msg.paymentSessionId = parseInt(
    msg.payload.resource.purchase_units[0].custom_id,
    10
)

return msg
More about the returned values can be found in the PayPal documentation.
More details about the Function node can be found here.
7.7. Updating the Payment Status
- Drag the "admin-api" node onto the workspace and connect it to the node from the previous step.
- Select the method "Payment session update".
- Insert the code from the description below into the "Query parameters" field.
{
    "id": {{paymentSessionId}}
}
- Insert the code from the description below into the "Request body" field.
{
    "status": "completed"
}
Here, we update the payment status by its identifier from "msg.paymentSessionId".
More details about the admin-api node can be found here.
7. Add a Webhook in Your PayPal Account
The link to your project + /api/admin/workflows/endpoints/paypal.
Example:
https://integrations-study.oneentry.cloud/api/admin/workflows/endpoints/paypal
More details can be found in the PayPal documentation.
8. Testing the Integration
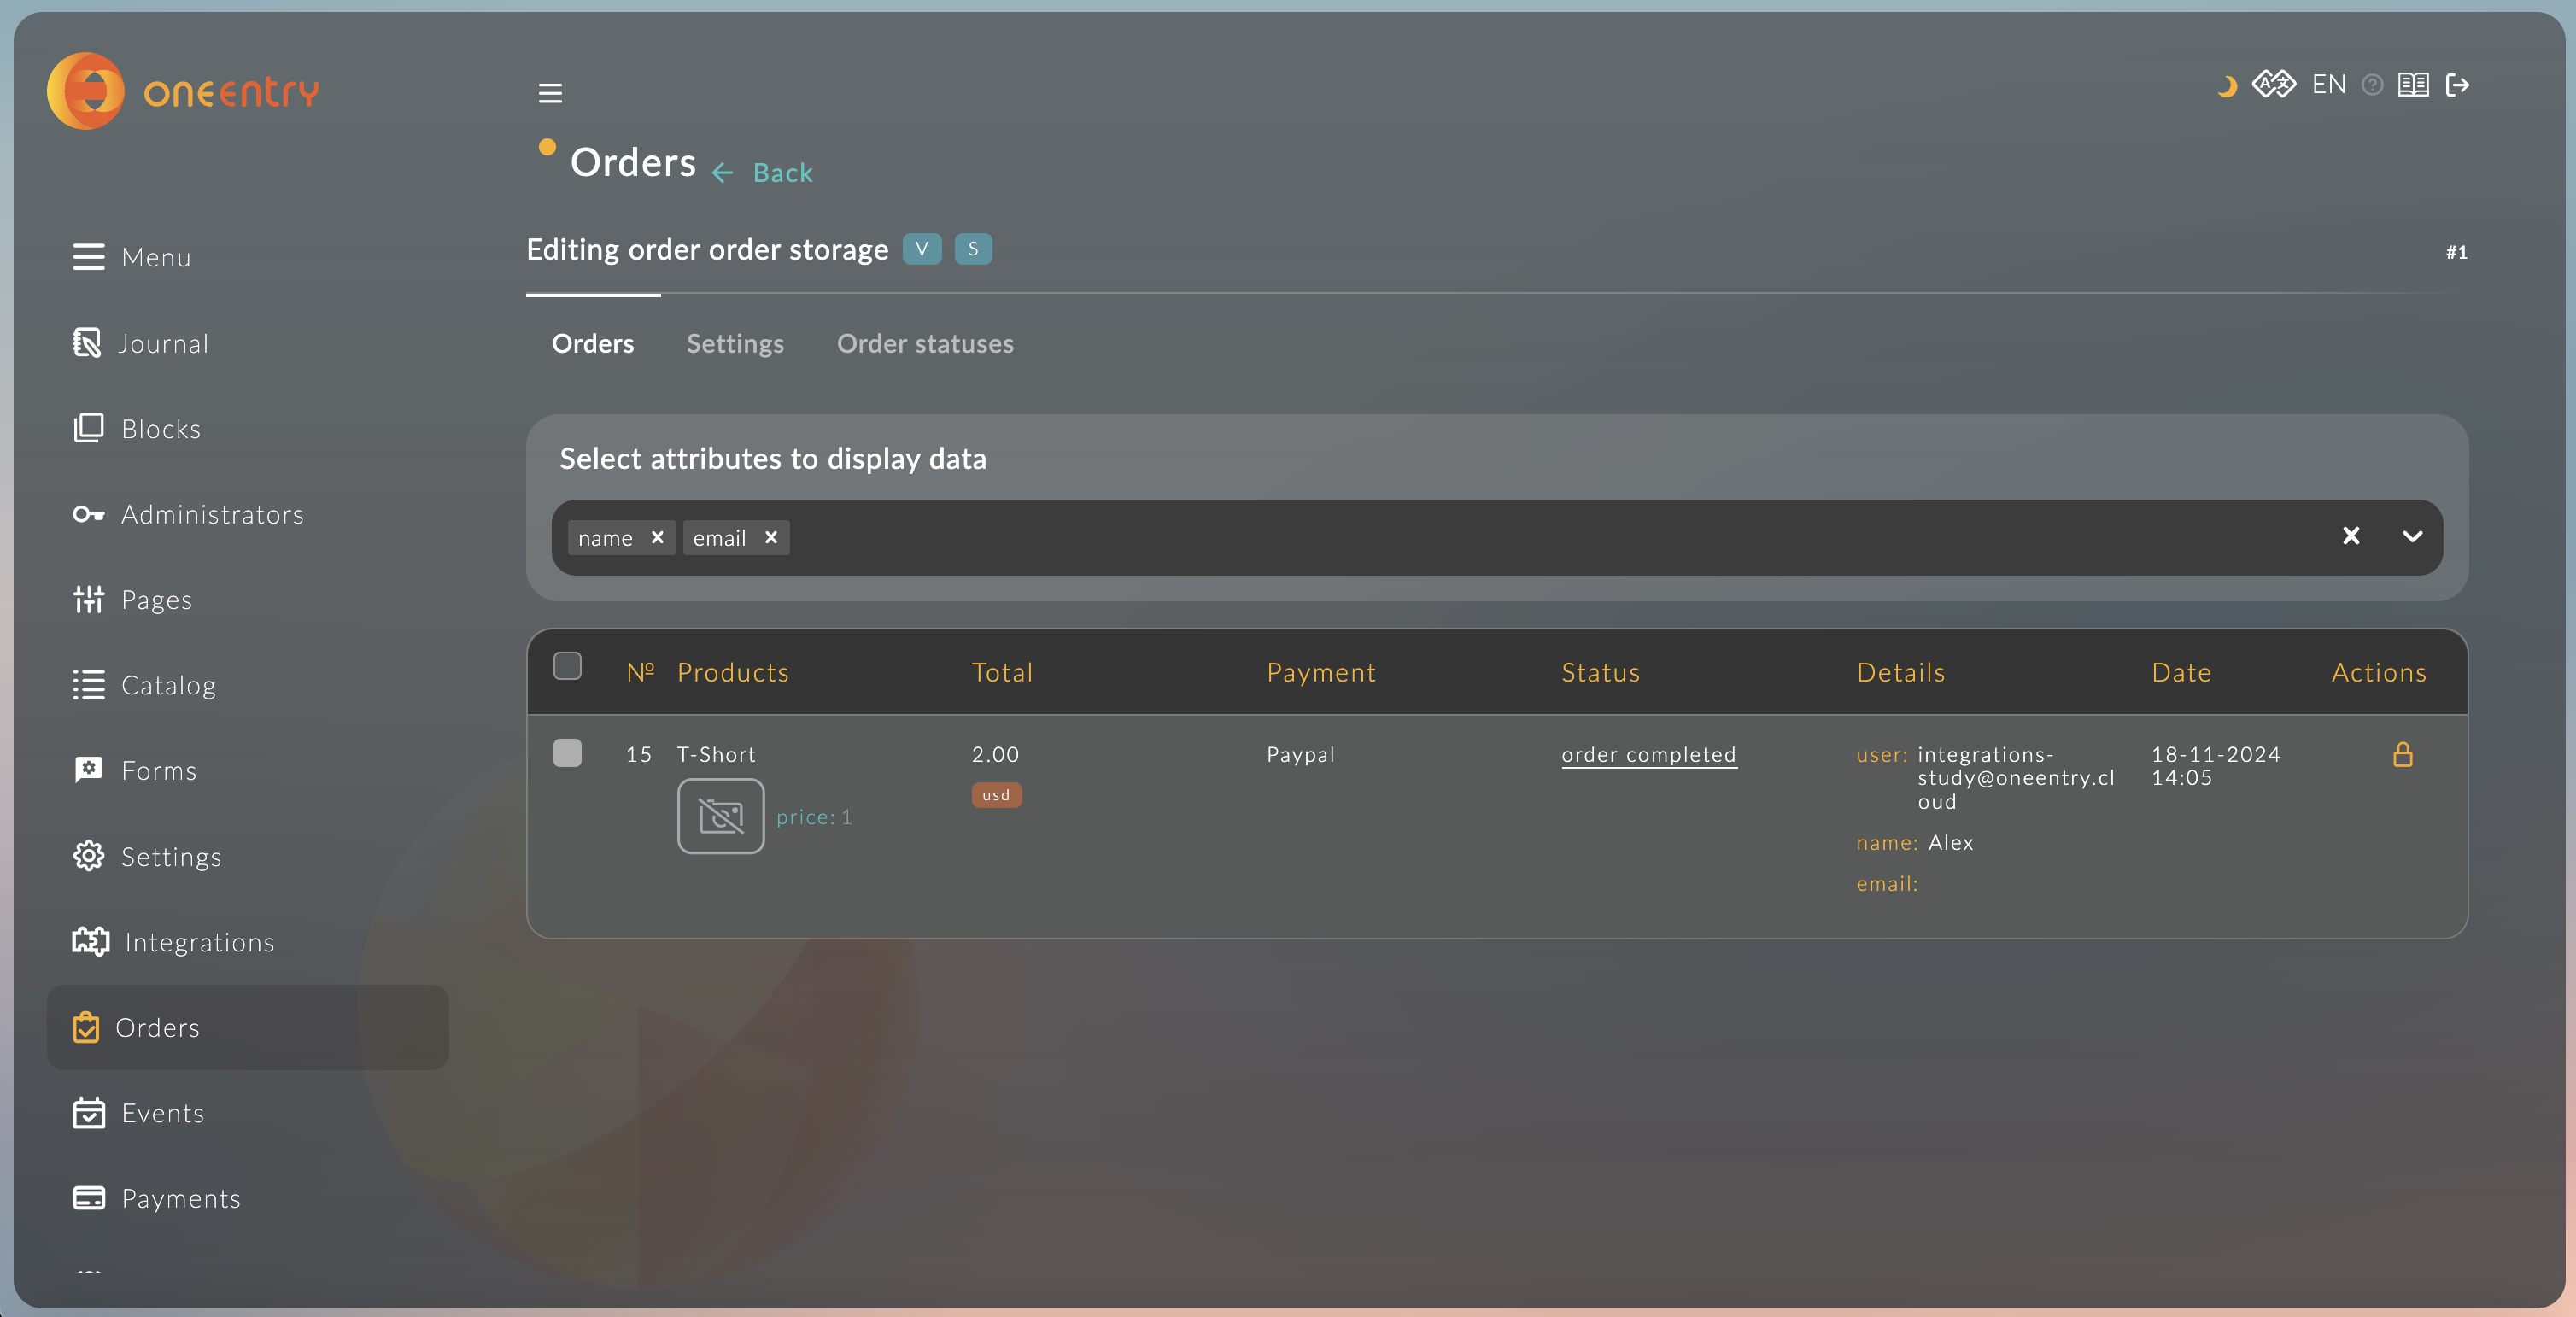
8.1. Create an Order
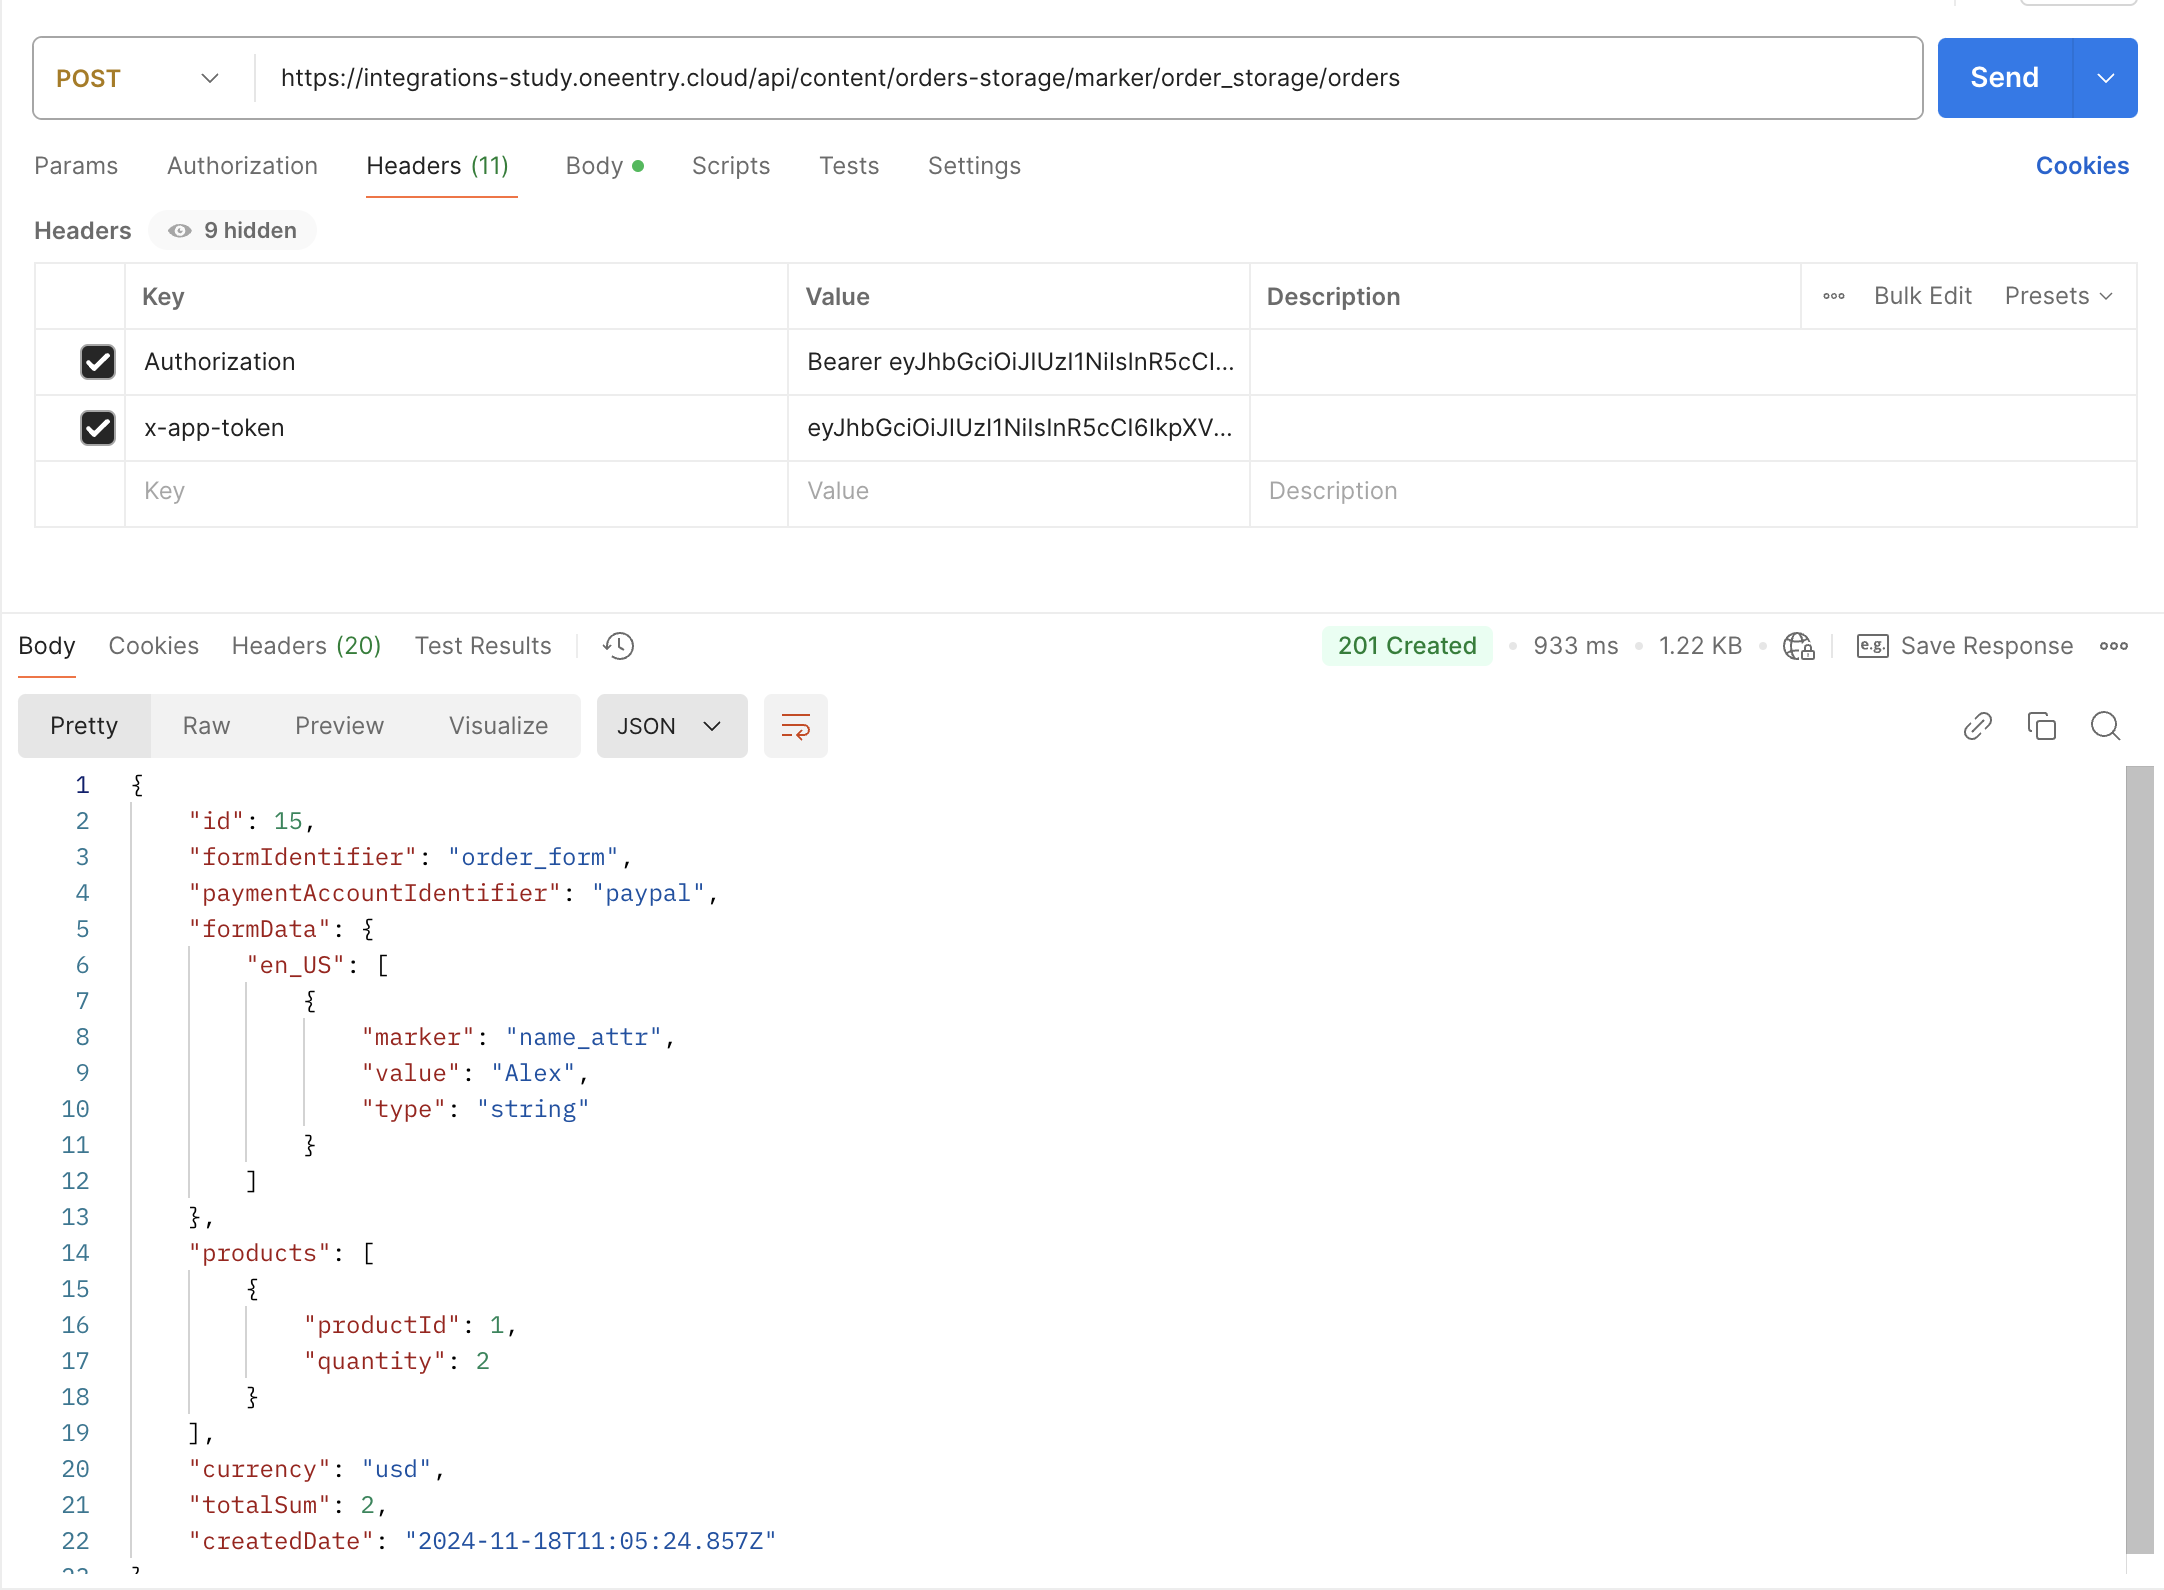
Instructions on how to create an order are described in the API documentation.
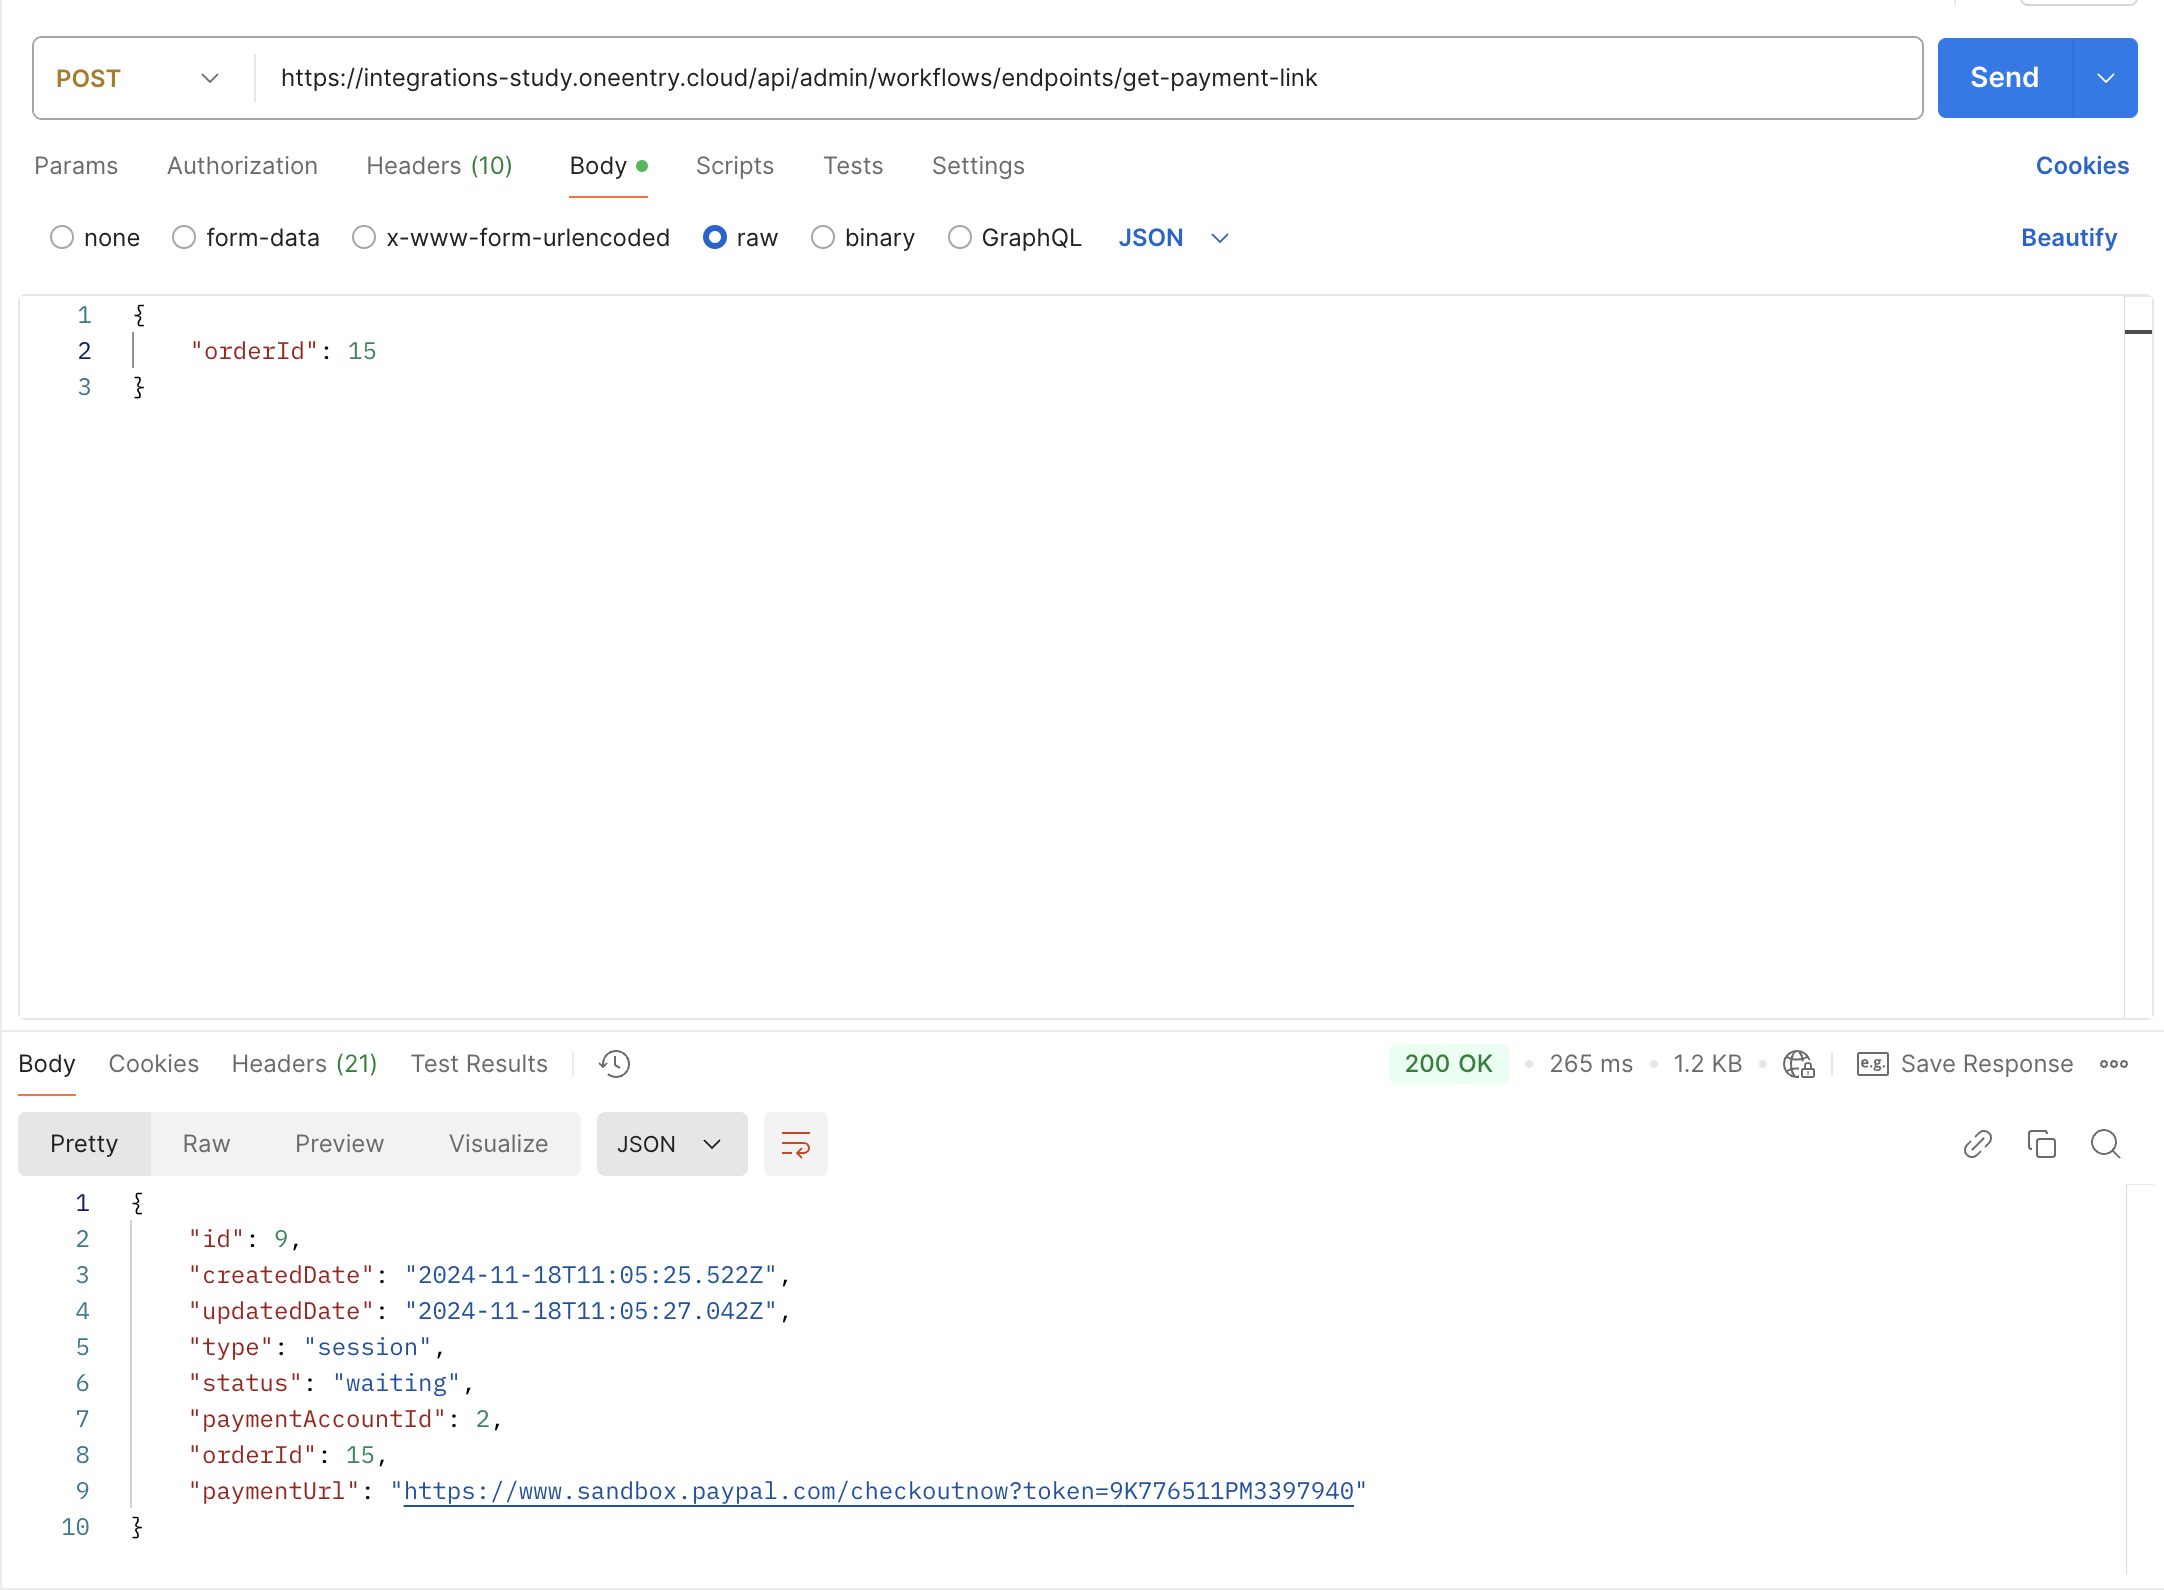
8.2. Get the Payment Link
-
Make a POST request to
https://integrations-study.oneentry.cloud/api/admin/workflows/endpoints/get-payment-link, replacinghttps://integrations-study.oneentry.cloudwith the link to your project. -
In the request body, specify the ID of the order created earlier:
{
    "orderId": 15
}
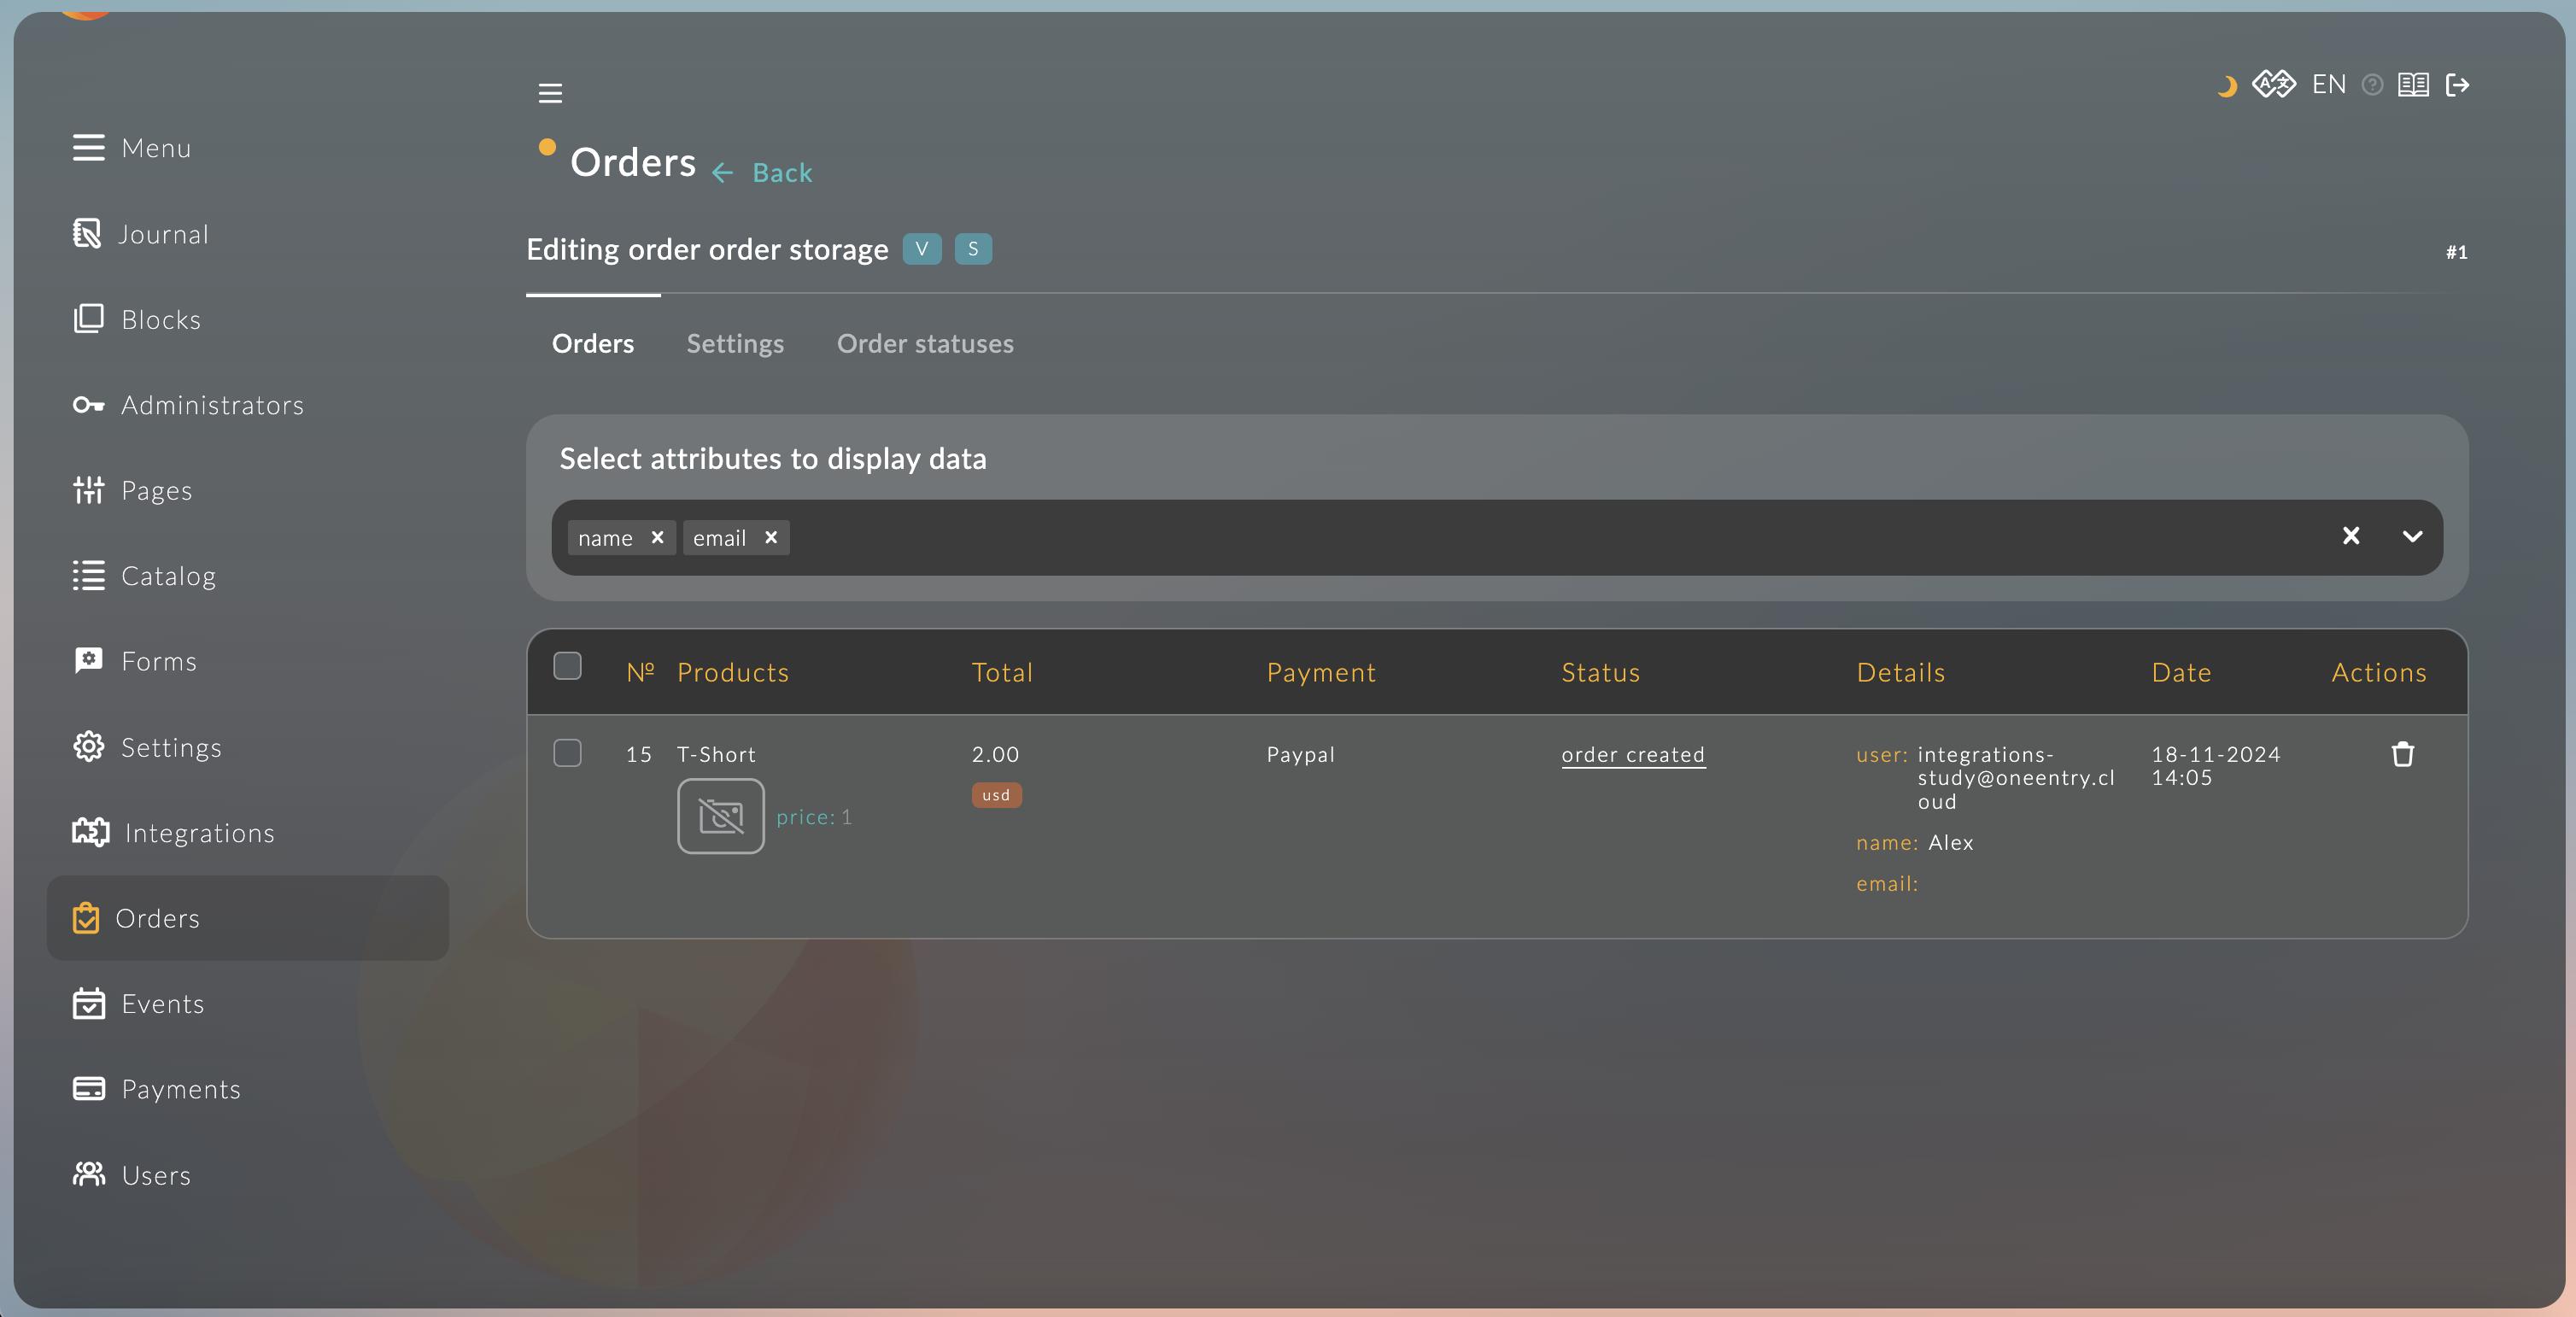
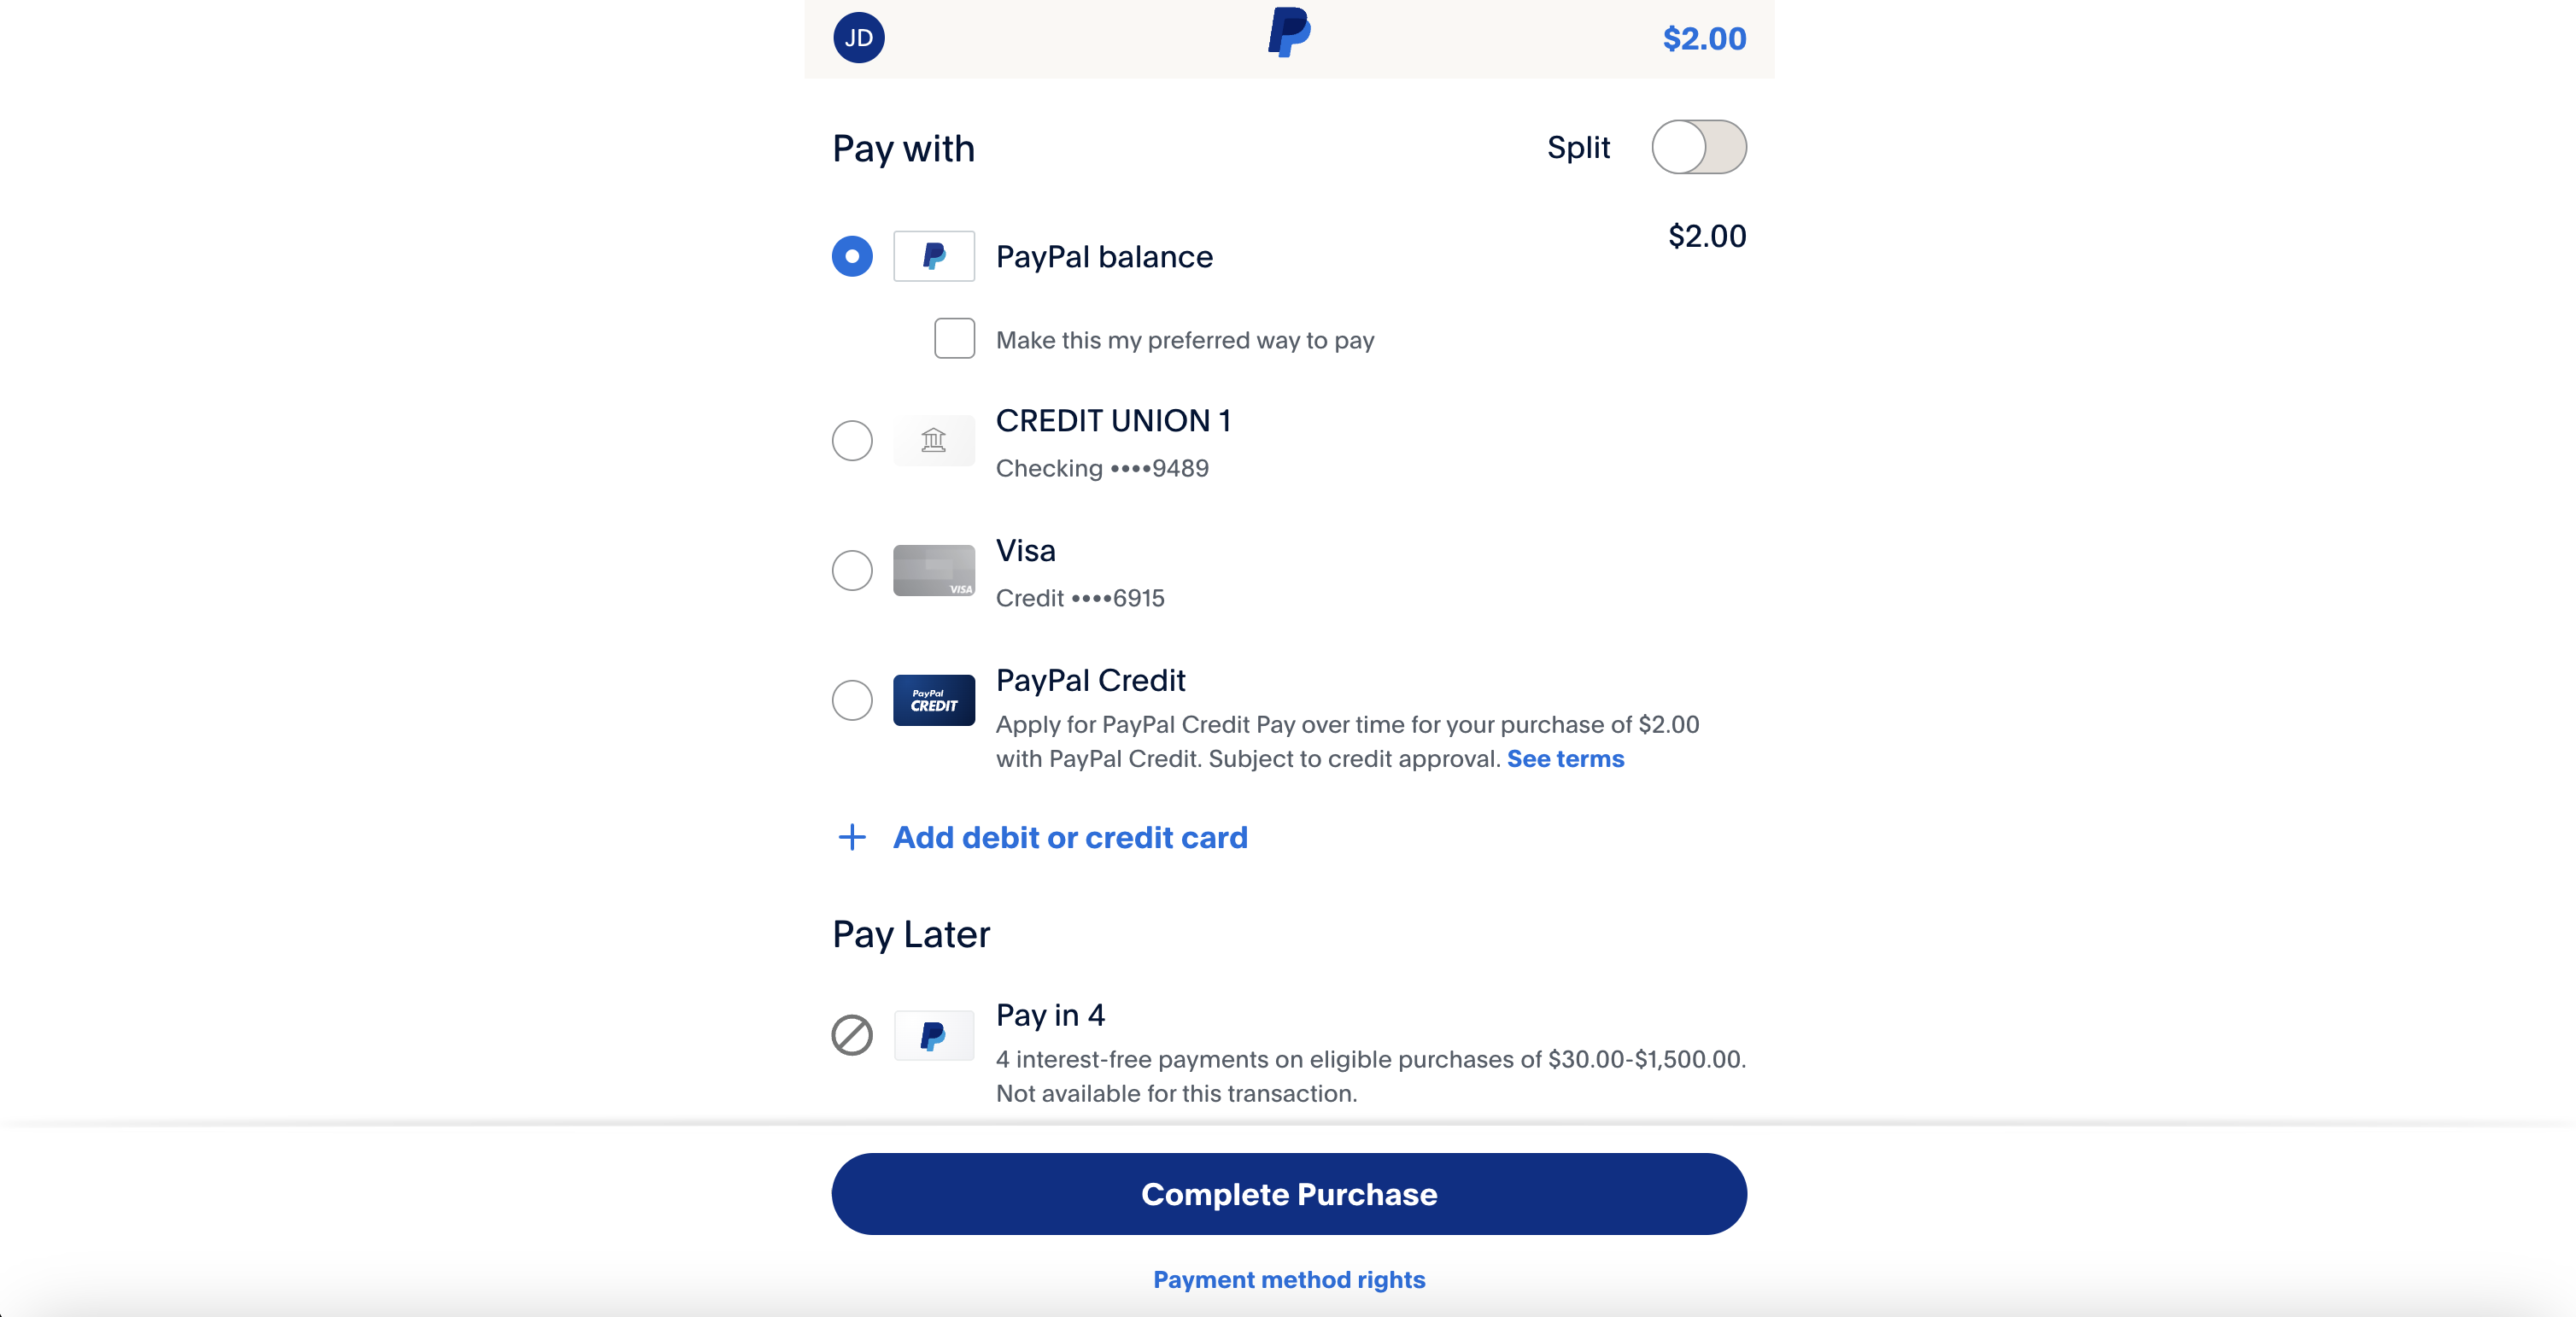
8.3. Pay for the Order
8.4. Check the Order Status